

An ER diagram that’s not easy to read isn’t much help. Learn how to align ERD elements – and better organize your diagram – in Vertabelo’s online data modeler.
Designing great ER models is not just about creating the right tables, defining the correct data types, and adding references. To make the model readable and easy to understand, you should arrange it neatly. This is where the alignment and distribution of the different ER diagram elements (tables, reference lines, notes, subject areas, etc.) comes into the picture.
A neat and organized data model saves time whenever anyone looks at it. There are several steps that you can take to improve the readability of your ER diagram. We went through some methods earlier in our articles on using subject areas, creating shortcut tables, and color-coding diagram elements. In this article, we’ll take the ERD organization to the next level by showing you how to align, distribute, and size different model elements.
Let’s get started.
Alignment, Distribution, Sizing, and More
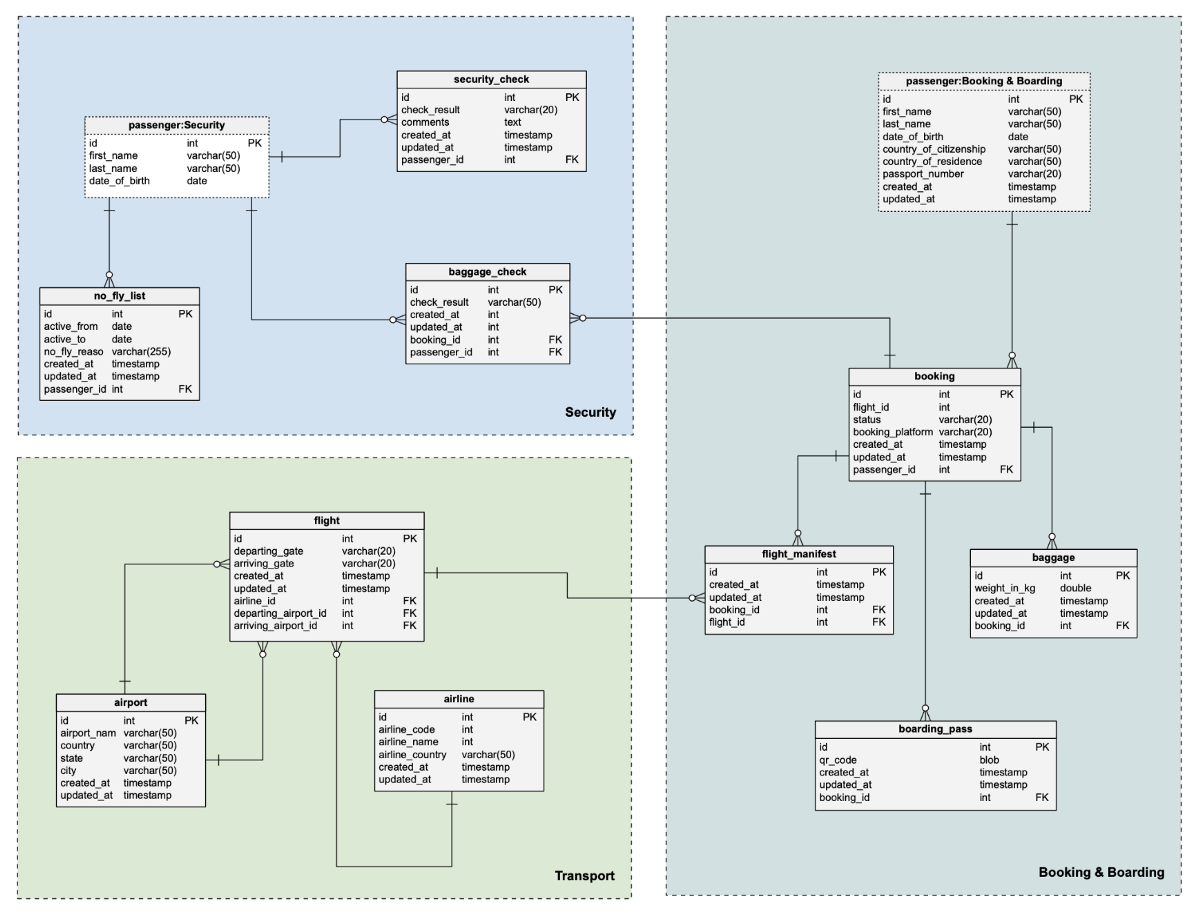
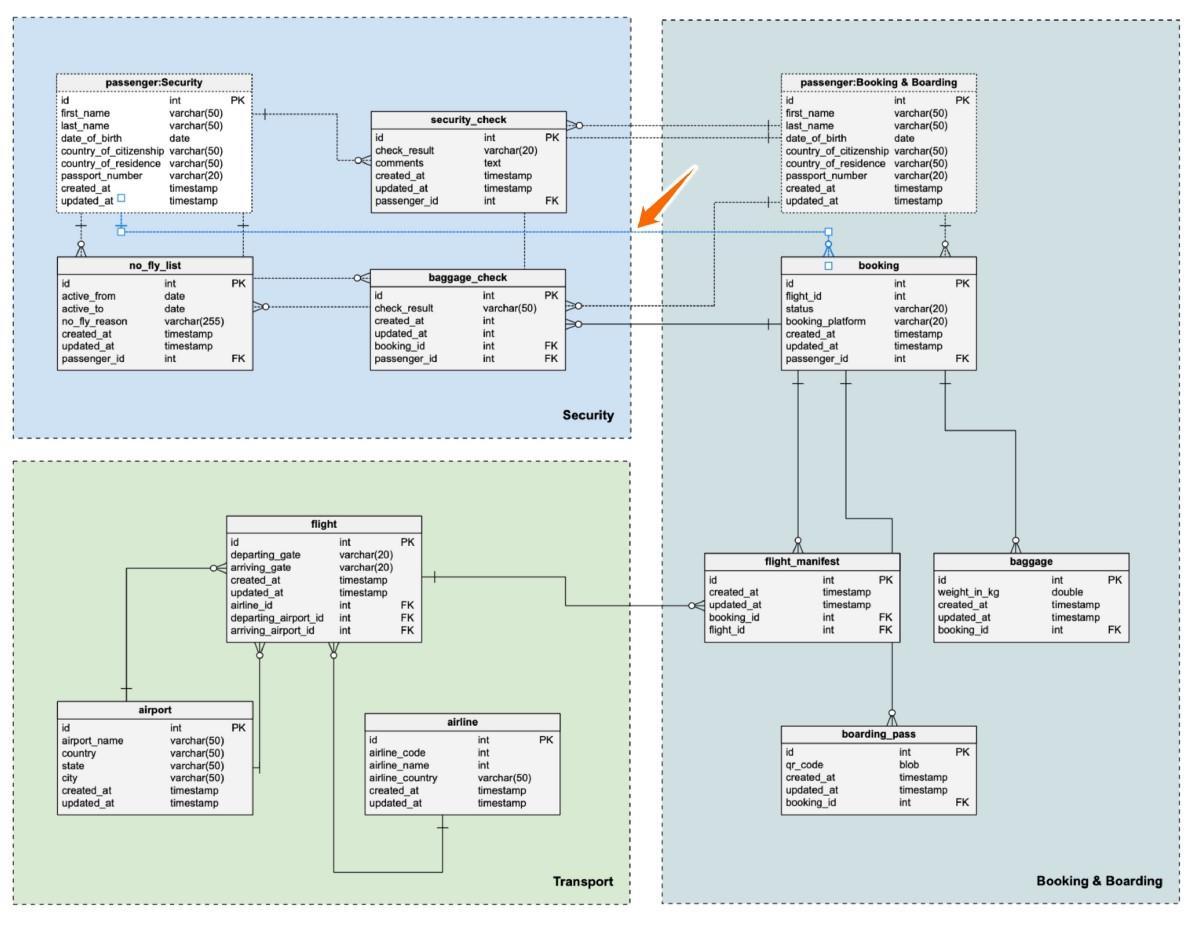
We’ll use the following ER diagram to demonstrate alignment, distribution, sizing, and similar features that make a data model more readable:
You can see that, although the diagram uses the subject area construct along with shortcut tables, it doesn’t look the best. This is because the different components are not aligned properly. Most of the elements used in an ER diagram are shaped in the form of lines or rectangles. These shapes tend to be more readable when their boundaries align.
Vertabelo Features
Vertabelo offers five advanced options for data model component arrangement and organization; these ensure that your data model is easily readable. Let’s look at each one individually.

1. Align Elements
The Align Elements tool allows you to vertically or horizontally align a group of tables. This is done by aligning one or more tables in the same direction to a selected table. Hence, you have to select at least two tables for the align menu to activate. As mentioned earlier, you can align the tables vertically (top, center, bottom) and horizontally (left, center, right).
In the following example, you can see that three objects are selected across two subject areas.
passenger:Securityno_fly_listairport
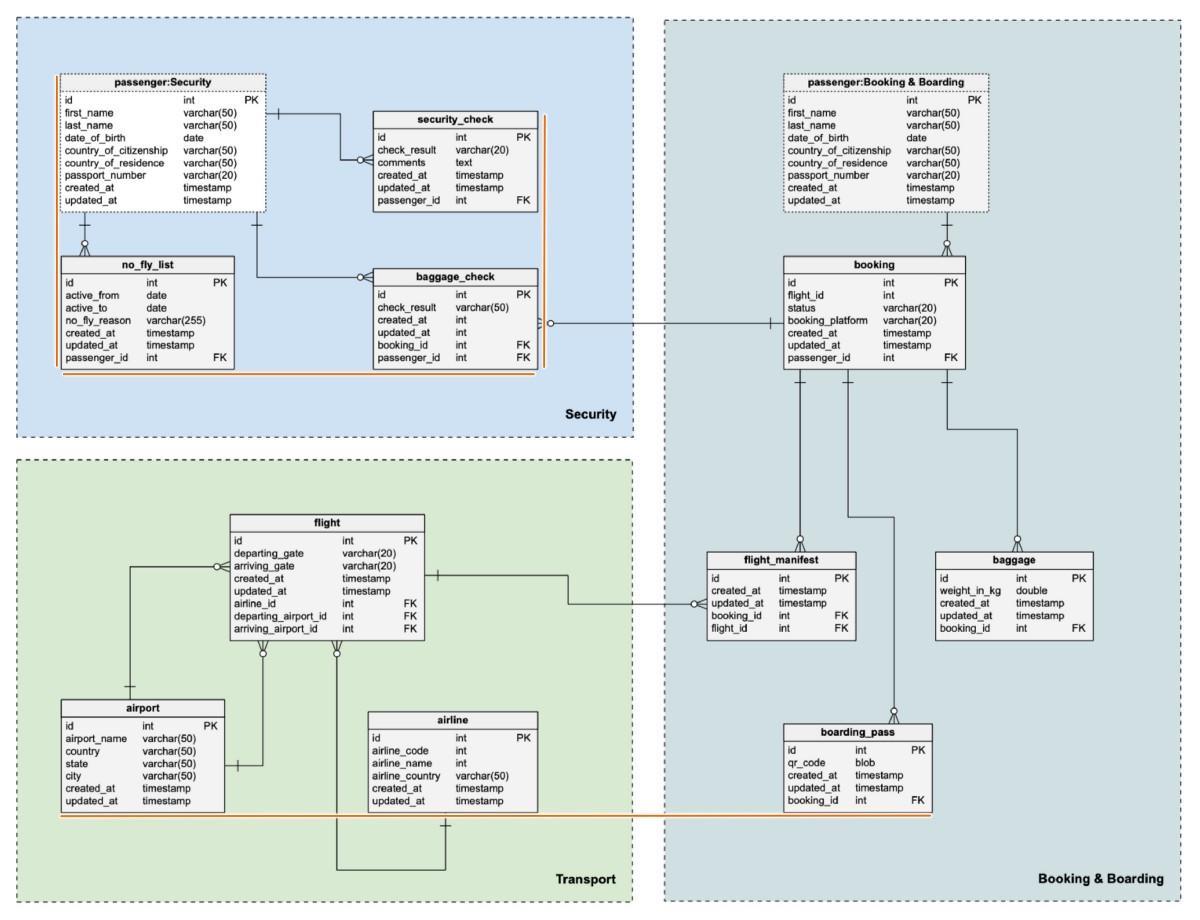
Earlier, these tables were not aligned. After doing a left alignment on the three selected tables, you’ll get the following result:
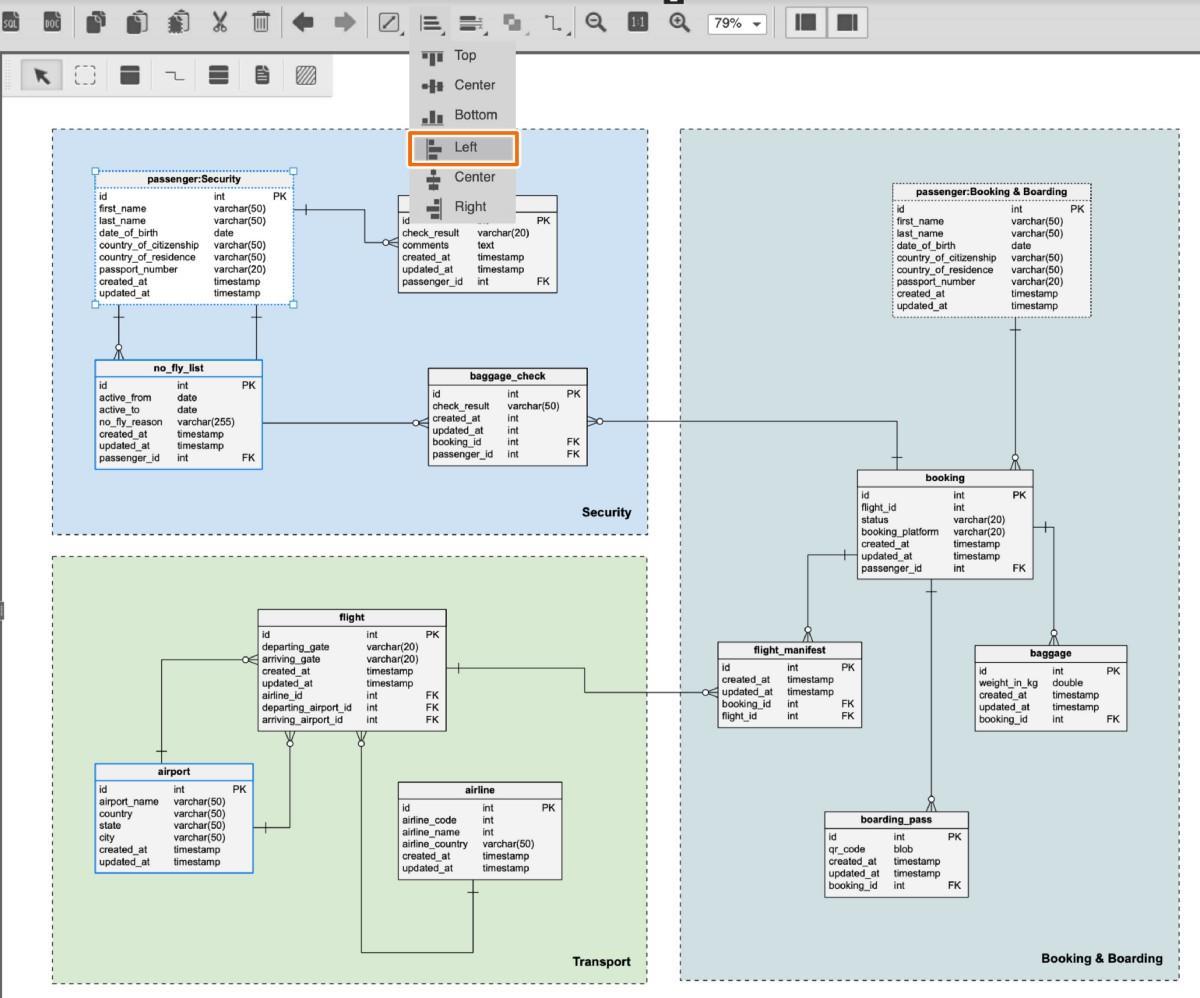
Once the left alignment is done, the objects are vertically aligned. You can also ensure that they are horizontally aligned by repeating the process using the Top, Bottom, or Center alignment options.
In the following example, please note that the tables in the Security subject area are aligned as follows:
- Left
alignment→passenger:Security, no_fly_list - Right
alignment→security_check, baggage_check - Bottom
alignment→no_fly_list, baggage_check
You can also align objects across multiple subject areas. The tables airport, airline, and boarding_pass have been aligned using the Bottom alignment:
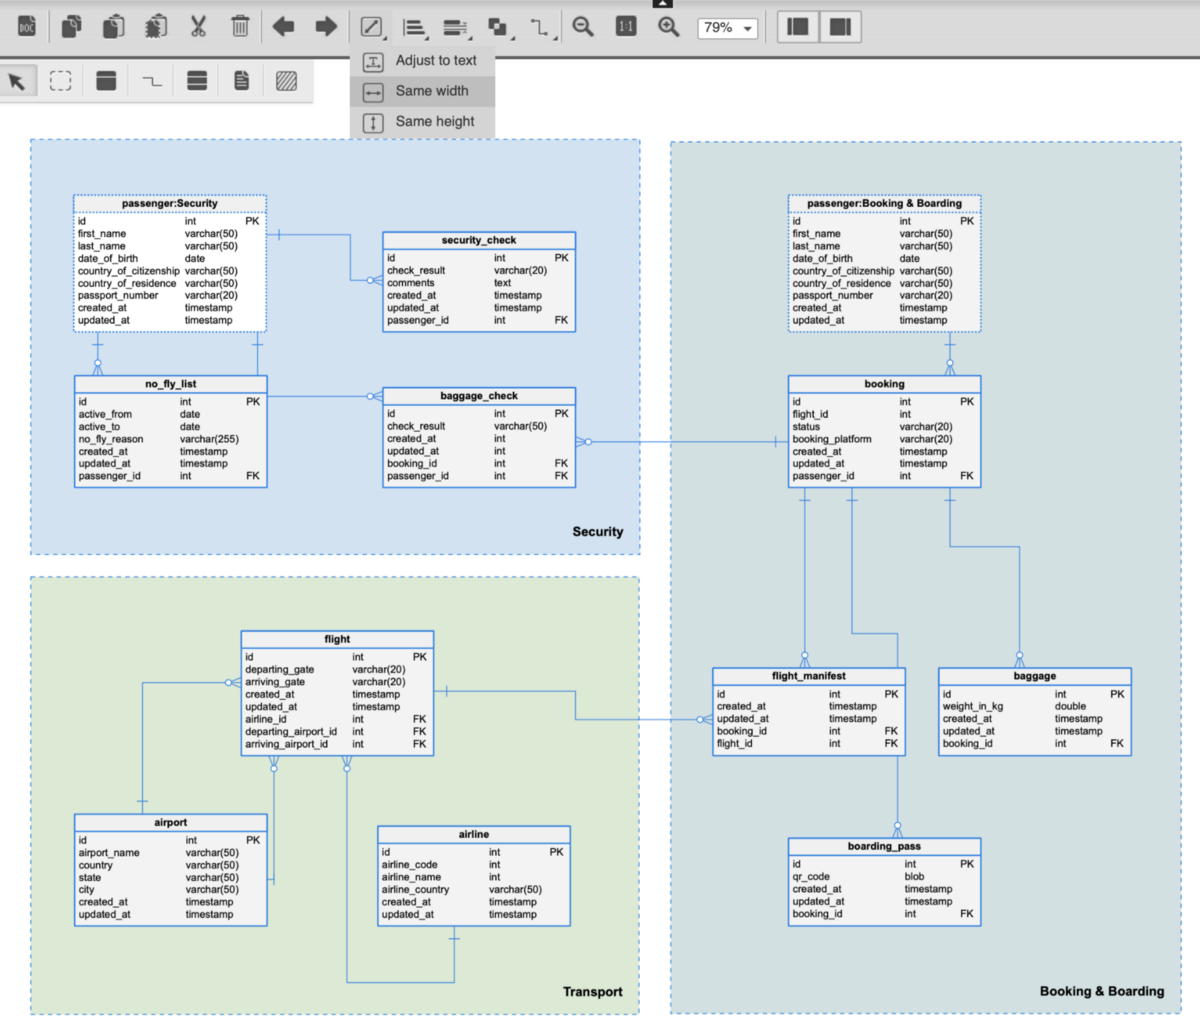
2. Size
The Size menu option allows you to modify the size of the element. You have three options to choose from:
- Adjust to text — Adjust the table's dimensions based on the table definition text (field_name, data type, and constraints). This is a useful feature to automatically expand the table when column names or data types don’t fit the table box.
- Same width — The width of two or more tables will be the same.
- Same height — The height of two or more tables will be the same.
In the screenshot below, you can see these three options. Notice that all the tables in the data model are selected.

In the following screenshot, you will see that we applied the Same width adjustment to the objects. Now the width of all the objects is the same. As we had already used a left align adjustment to the tables, you can see that the tables are automatically aligned on the right and the left because of the adjustment.
3. Distribution
The Distribution button allows you to distribute three or more boxed elements (tables, views, or text notes) by reorganizing them evenly within the space, which improves readability. You can distribute elements vertically (justify, top, center, bottom) and horizontally (justify, left, center, right).
In the following example, the vertical Justify option is applied to three objects: flight, airport, and airline.
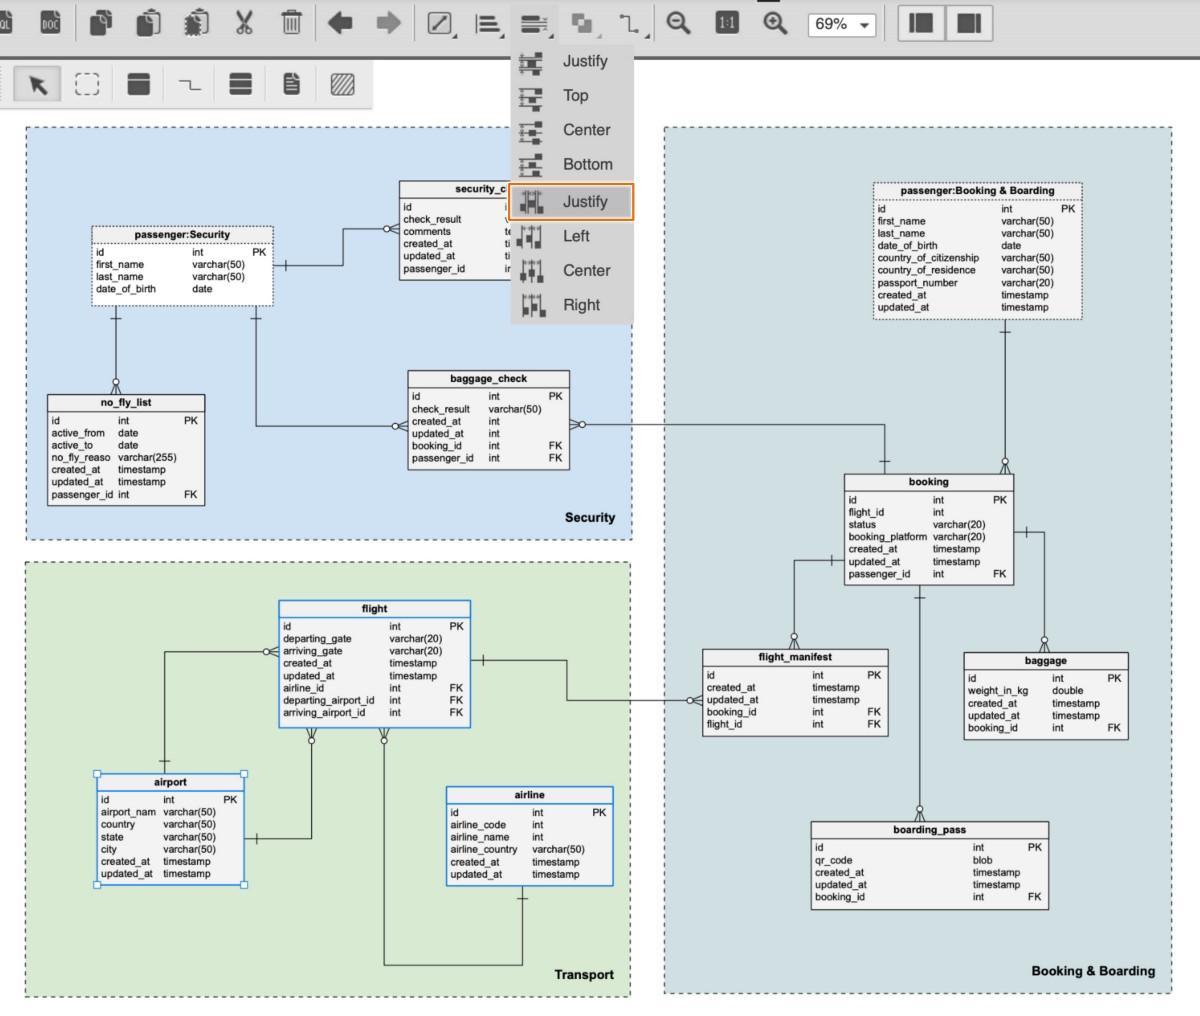
After applying the distribution, the objects look more horizontally equidistant from each other. This was the prime motive of this physical rearrangement, as you can see below:
4. References
Until now, you have learned how to reorganize boxed elements. This section will demonstrate how to better organize the reference lines that hold all the model objects together. There are four options that you can choose from:
- Show all references – Highlight all the reference lines in the data model. Looking at all the references together can help you identify issues with reference lines right away.
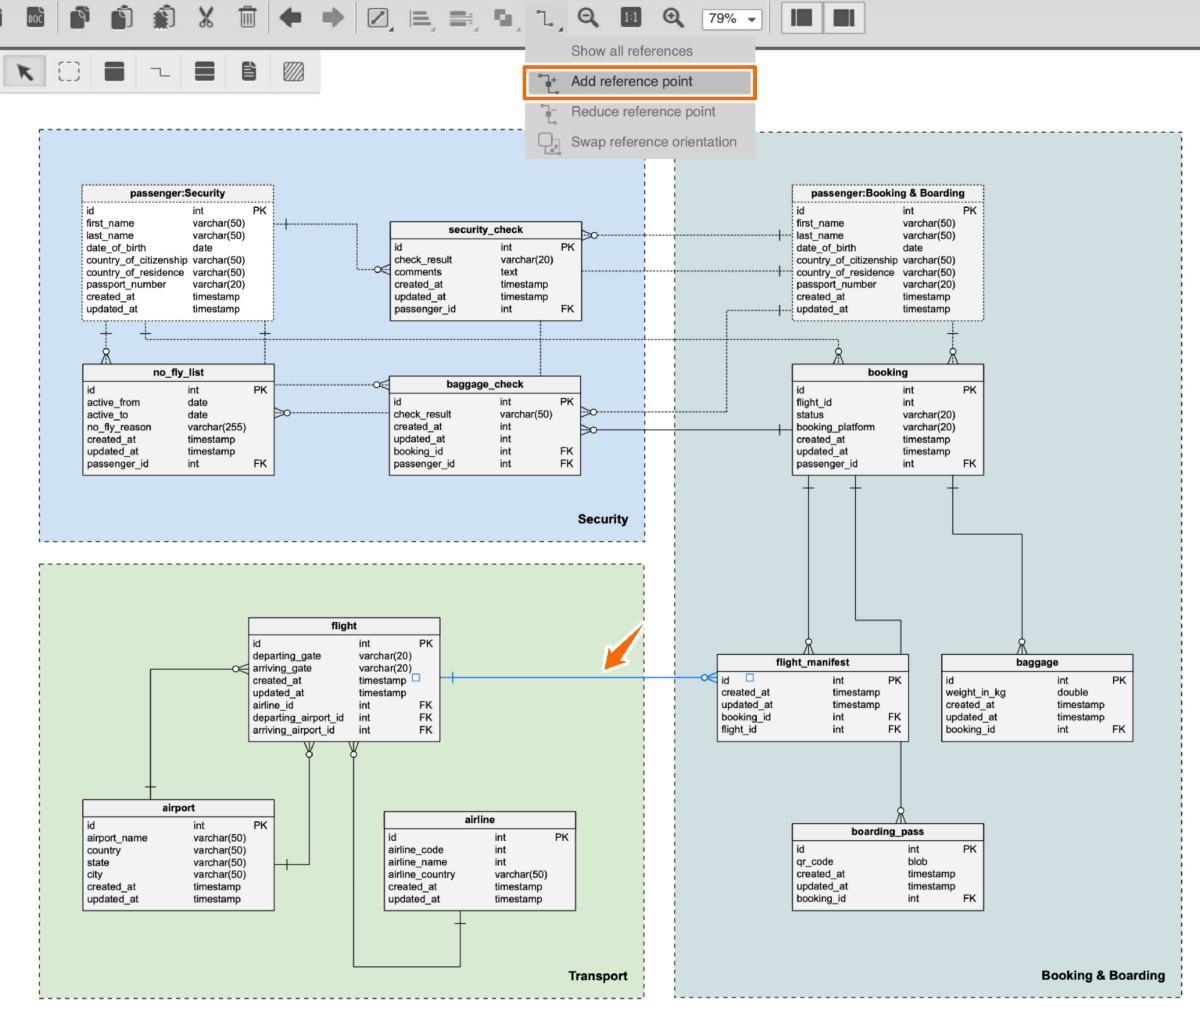
- Add reference point – Add a reference point to a selected reference. Adding a reference point gives you the flexibility to draw a clear reference line that’s not hiding behind boxed objects.
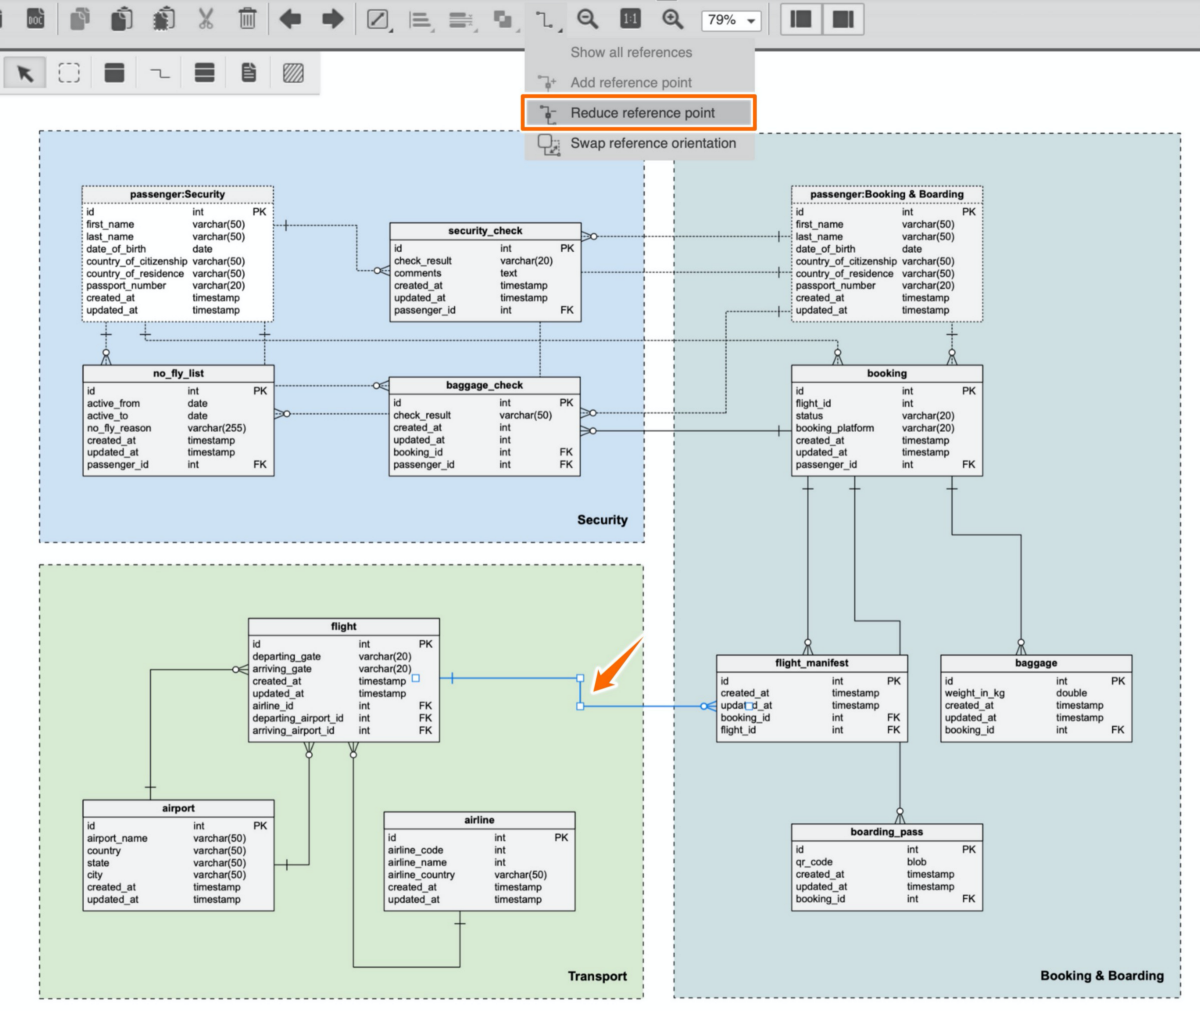
- Reduce reference point – Remove a reference point from a selected reference. Removing unnecessary references from a complex data model is a very useful way to simplify it.
- Swap reference orientation – Swap reference orientation on both sides of the reference, i.e. if one end of the reference line starts from the horizontal line of a boxed item, it will switch to the same boxed item's vertical line. The same will follow for the other boxed item.
Let’s examine the last three options.
Reduce reference point
In the following example, you will learn how to reduce a reference point. It would be best if you had a reference line selected. Once you press the Reduce reference point button, it removes the reference point and makes the reference line straight. This option is active only when the reference line can be straightened without moving the tables.
Add reference point
Let’s add the removed reference point back by using the Add reference point option:
Swap reference direction
In the following example, notice how the reference line is unclear – it’s almost overlapping the baggage_check table. In this situation, you cannot make the line organization better without moving the tables or changing the reference line's orientation. Assuming that your tables are already aligned and shouldn't be moved around, you can use the Swap reference orientation option.
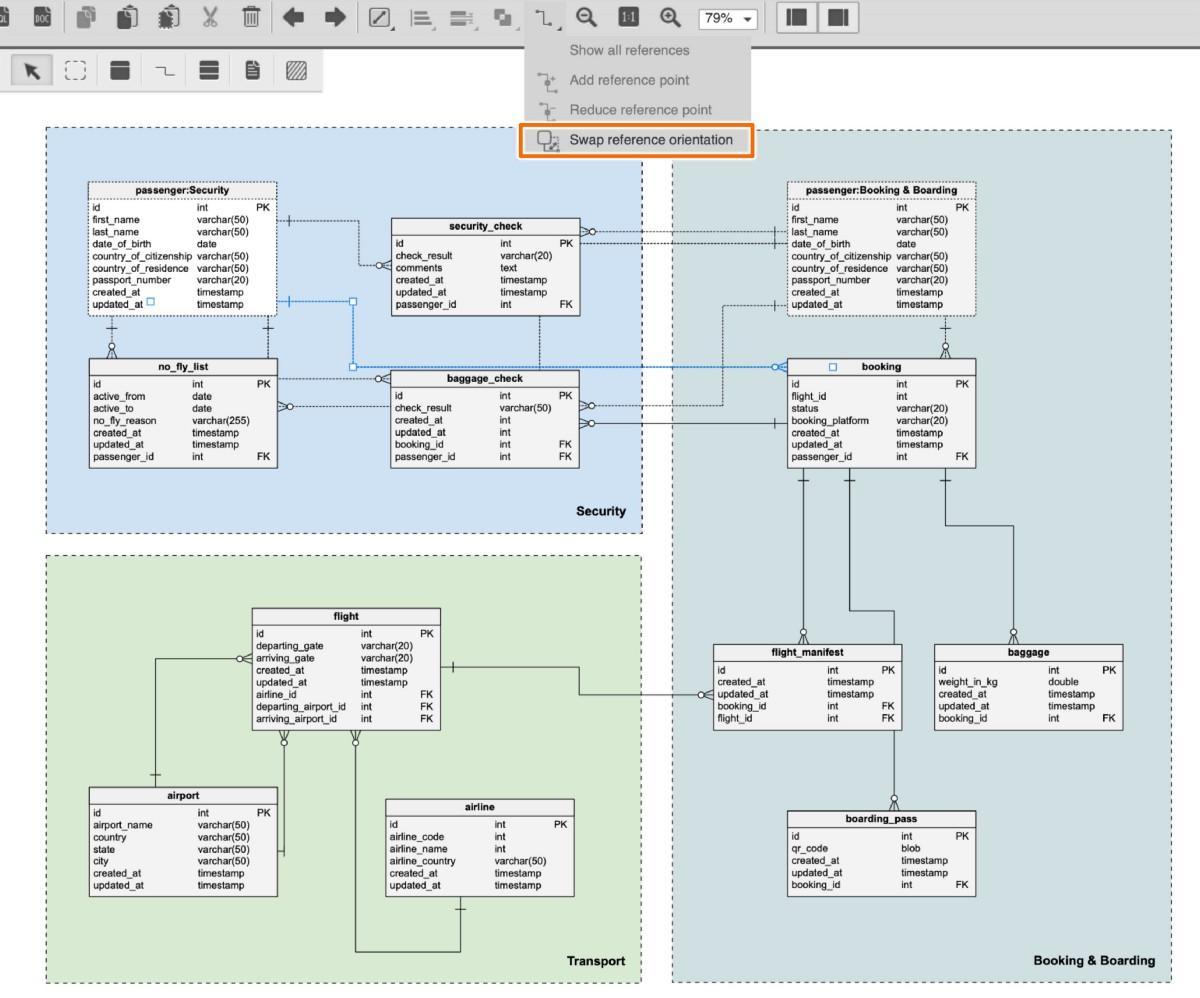
Swapping the reference orientation on both sides of the reference line will result in something like the following:
As you can see, we were able to organize the reference line better without moving the boxed objects.
5. Order
The Order option is activated when a subject area is selected. If your data model has overlapping subject areas, Order will bring one subject area in front of another subject area (if you wish to do so) by setting the z-index.
Share Your Thoughts on Organizing Data Models
Data modeling efforts are wasted when the data model is not readable and maintainable. In earlier articles, we discussed using different objects and constructs like table shortcuts and subject areas to better organize data models. This article discussed the next steps in organizing your data model with Vertabelo features like alignment, sizing, and distribution. We also made the case that a data model can be made more readable by making it more organized and clear.
We’d be happy to learn about your experiences in better organizing data models. Let us know in the comments section or write to us at contact@vertabelo.com.
