

Vertabelo Feature: Snowflake Support
Cloud and analytical databases are very popular and are becoming more important. Snowflake has been one of the most popular feature requests on our support page and a much-anticipated database for Vertabelo support. We are happy to announce that Snowflake databases can now be designed with Vertabelo!
In this article, we’ll explain how to create a physical ER diagram for a Snowflake database in Vertabelo. Remember that you can also choose to create a logical ER diagram first and then use that to generate a physical ER diagram. You can read more about moving from logical to physical ERDs here.
If you’re working with multiple Cloud databases, check out our articles on Google BigQuery, Amazon Redshift, and how to model a Redshift database in Vertabelo.
What Is Snowflake?
Snowflake is a specialized relational database dedicated to data analytics. It provides an environment that enables data aggregation from various sources (data lake) and their subsequent analysis. Snowflake is offered in an as-a-service model and does not require managing the infrastructure where it is installed.
From the user's perspective, Snowflake is firmly based on the SQL standard for both queries and DDL code. Interestingly, many DDL commands in Snowflake have no effect but instead exist only to maintain compatibility with the standard.
How to Create a Snowflake Data Model in Vertabelo
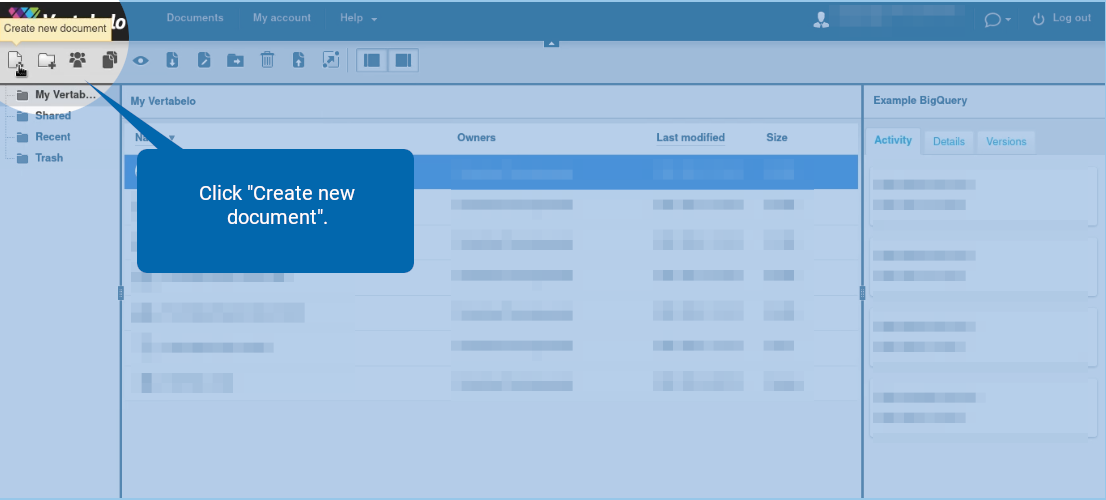
First, let’s see how to create a Snowflake data model. Log into Vertabelo and click on the ![]() icon.
icon.
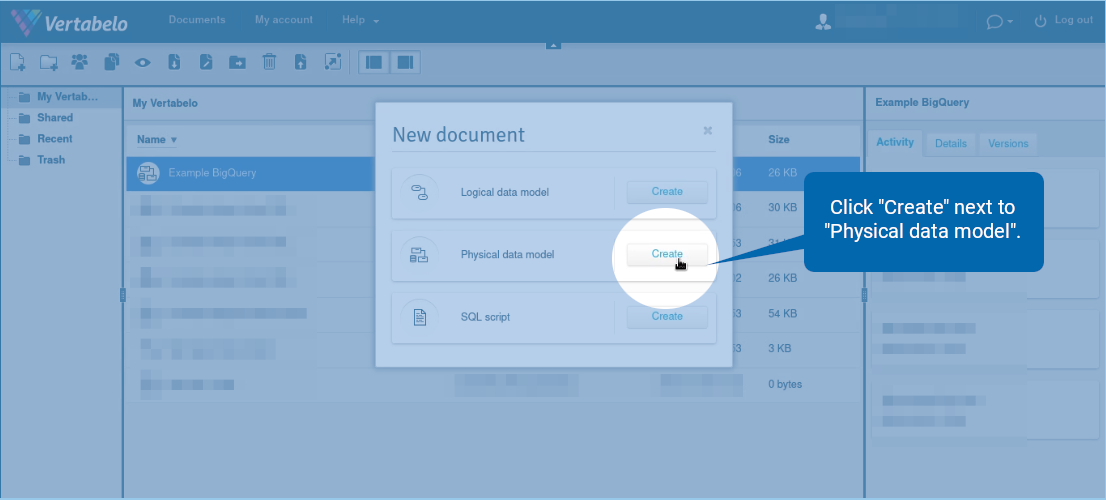
A new window appears. Click “Create” next to “Physical data model”.
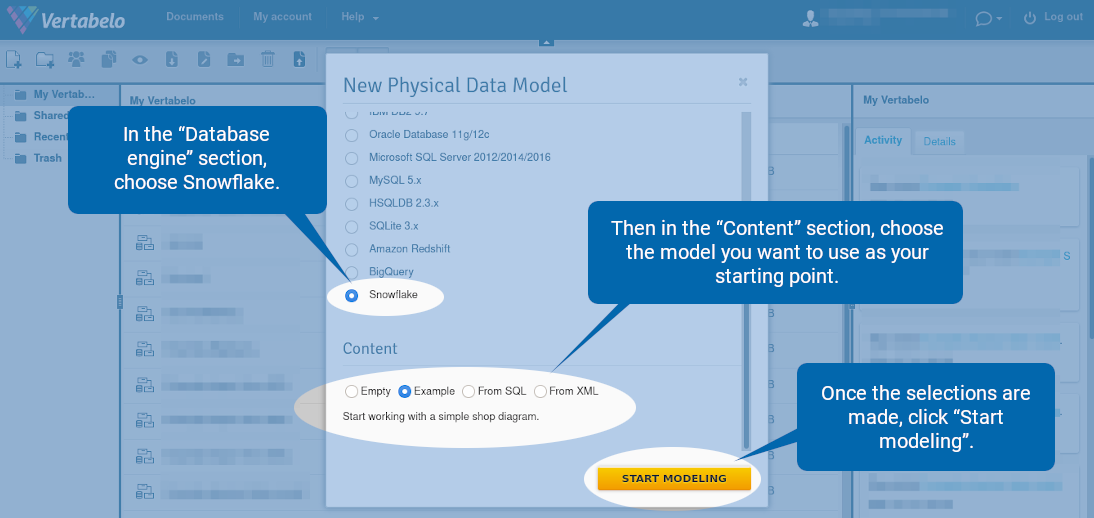
In the “Database engine” section, choose Snowflake. Then in the “Content” section, choose the model you want to use as your starting point. Your options are:
- Empty – An empty diagram with no tables or views.
- Example – A simple shop diagram.
- From SQL – Import a DDL file for extracting tables and views. It can be a useful option especially if there is an existing schema.
- From XML – Import a Vertabelo XML file. It can be useful for restoring old versions of models created in our database modeling tool.
Once the selections are made, click “Start modeling”.
Tables
Note: For more details, see the full documentation on working with tables in Vertabelo.
How to Draw a Table
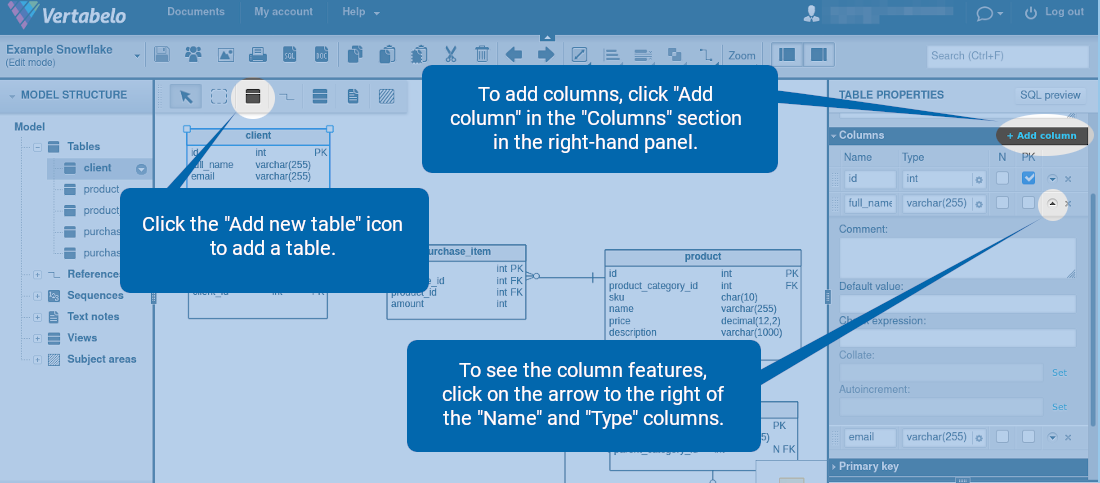
To create a table, click the ![]() icon. To add columns, click “Add column” in the “Columns” section in the right-hand panel. To see the column features, click on the arrow to the right of the “Name” and “Type” columns.
icon. To add columns, click “Add column” in the “Columns” section in the right-hand panel. To see the column features, click on the arrow to the right of the “Name” and “Type” columns.
Data Types
To set a column data type, simply type it in or click on the gear icon ![]() .
.
You should see all the available data types:
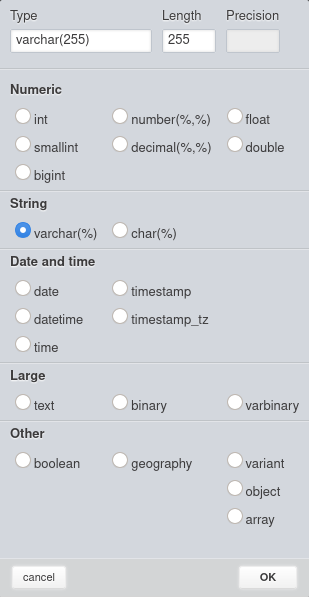
The data types are grouped into five categories:
- Numeric (int, smallint, bigint, number, decimal, float, double).
- String (varchar, char).
- Date and time (date, datetime, time, timestamp, timestamp_tz).
- Large (text, binary, varbinary).
- Other (Boolean, geography, variant, object, array).
Table Properties
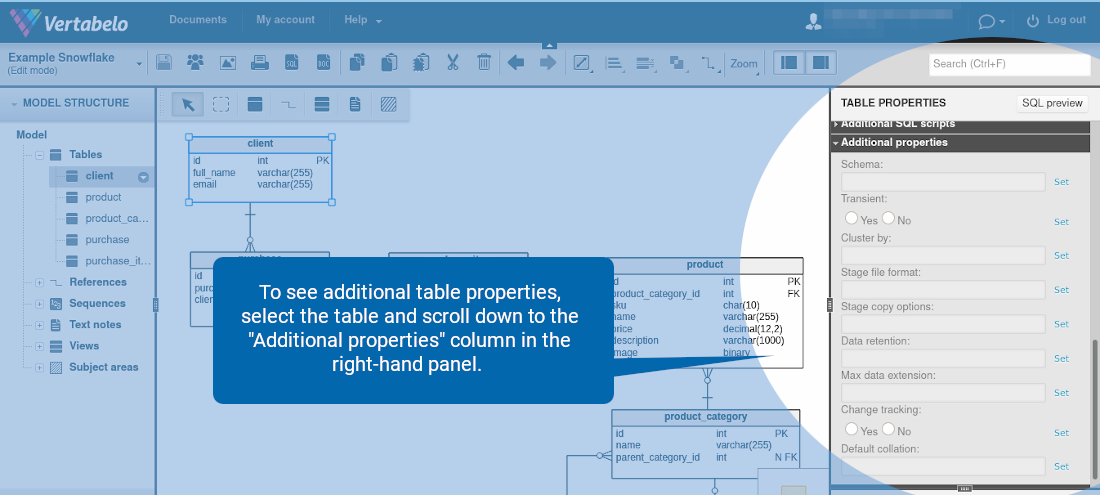
To see additional table properties, first select the table. Then in the right-hand panel, scroll down to the “Additional properties” section.
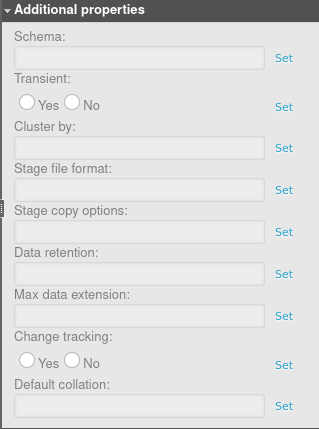
You should see all the available table properties:
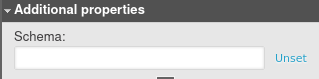
Click “Set” to add a property.

Click “Unset” to remove it.
Let’s go through each table property in Snowflake.
- Schema – The name of the schema in which the table will be placed.
- Transient – If set to Yes, the table will be transient.
- Cluster by – Determines how to cluster the table. This property is a comma-separated list of columns or expressions. When the table is clustered, the data inserted is sorted based on the clustering columns. This can improve performance when the data is queried later, as not all the rows will be scanned.
- Stage file format – A stage is used for loading data from files into Snowflake tables and unloading data from tables into files. This option specifies the file format to be used for the stage, which can be either a named format or a file type like CSV and JSON.
- Stage copy options – Additional options for the stage can be configured here. For more details, please refer to the official documentation.
- Data retention – The number of days for storing historical data, for the purpose of performing Time Travel actions. If set to 0, Time Travel is disabled for this table. Snowflake Time Travel allows you to access historical data (that has been changed or deleted) within a specified period.
- Max data extension – The data retention period can be extended to the maximum number of days specified here. By default, if the data retention is set to less than 14 days, Snowflake automatically extends it to a maximum of 14 days. This value can be decreased by using the Max data extension
- Change tracking – If set to Yes, the change tracking metadata is enabled for the table. It allows you to use the CHANGES clause to query the metadata within a specified interval of time, without the need to create a table stream with an explicit transactional offset (a stream records data manipulation language changes made to a table).
- Default collation – This property sets the default collation for
CREATE TABLEandALTER TABLE … ADD COLUMNThe valid collation options are listed in the specification.
Primary Keys
You can define primary keys for Snowflake in Vertabelo, and the DDL code to create the primary key will be generated. However, note that primary keys are not enforced by Snowflake. This syntax exists only for documentation needs and compatibility with other databases.
Unique (Alternate) Keys
Similar to primary keys, the unique keys can be defined, and Vertabelo generates the DDL code to create a unique key. However, Snowflake does not enforce UNIQUE constraints. They exist for documentation and compatibility needs only.
Column Features
To see the column properties, select the table. In the right-hand panel, you should see the “Columns” section.
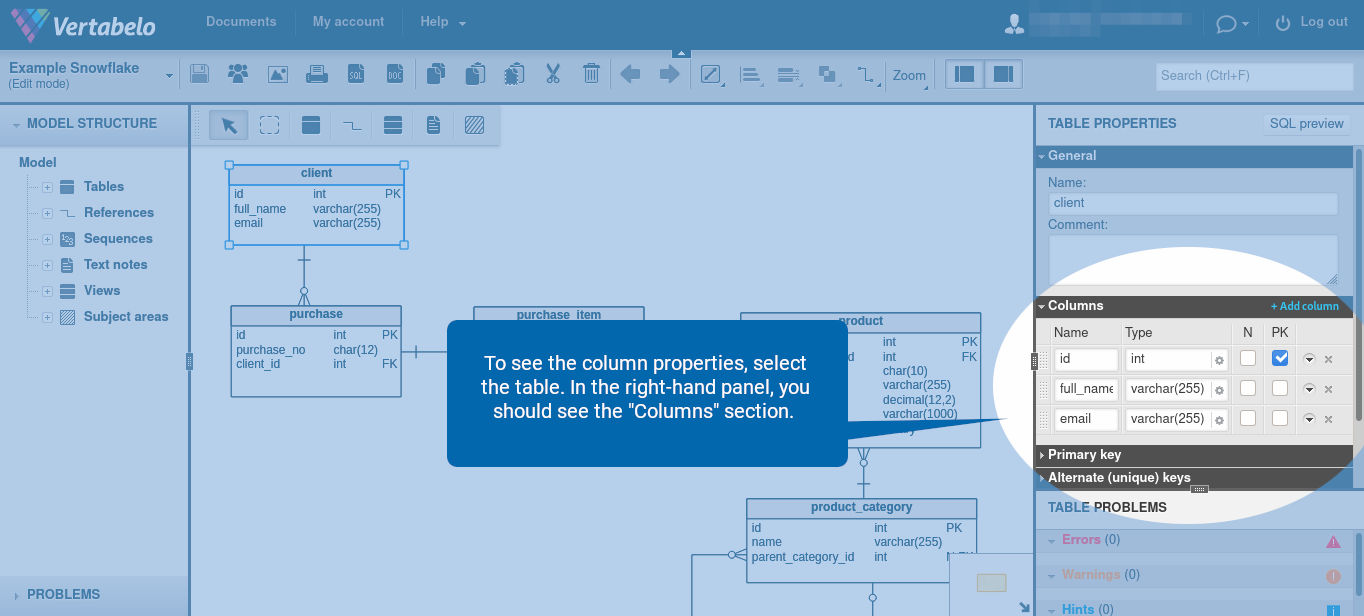
The following column features are available:
You can set a data type for a column, make a column nullable, and make a column a primary key. However, note that Snowflake enforces only the NOT NULL constraint for columns. As stated above, the primary key exists only for compatibility and documentation purposes.
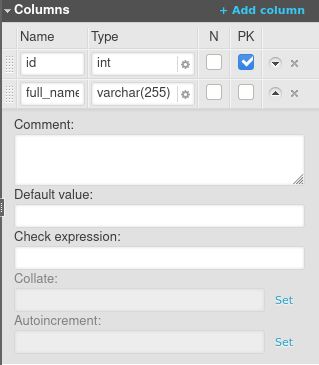
Here’s a brief explanation of the column features available in Snowflake.
- Comment – Snowflake allows you to insert comments for objects such as tables. Here, you can configure the comment to be inserted.
- Default value – The default column value.
- Check expression – While you may define additional integrity constraints here, note they are not supported by Snowflake. When a DDL file is generated, the contents of this field are ignored.
- Collate – Here, you can specify the collation for comparisons and other related operations performed on the column data. If not specified, the default is used (strings are compared based on their UTF-8 character representations).
- Autoincrement – Specifies the start value for the column and the step by which each successive value is automatically incremented. If this field is empty, the default value of 1 is used for both the start and the step. Note that this attribute can only be used for columns with numeric data types.
References
You can draw reference lines between tables in Vertabelo. However, note that the references are not included in the DDL code. They are present in the diagram for documentation purposes only.
Sequences
Note: You can read the full documentation on working with sequences in Vertabelo for more details.
How to Create a Sequence
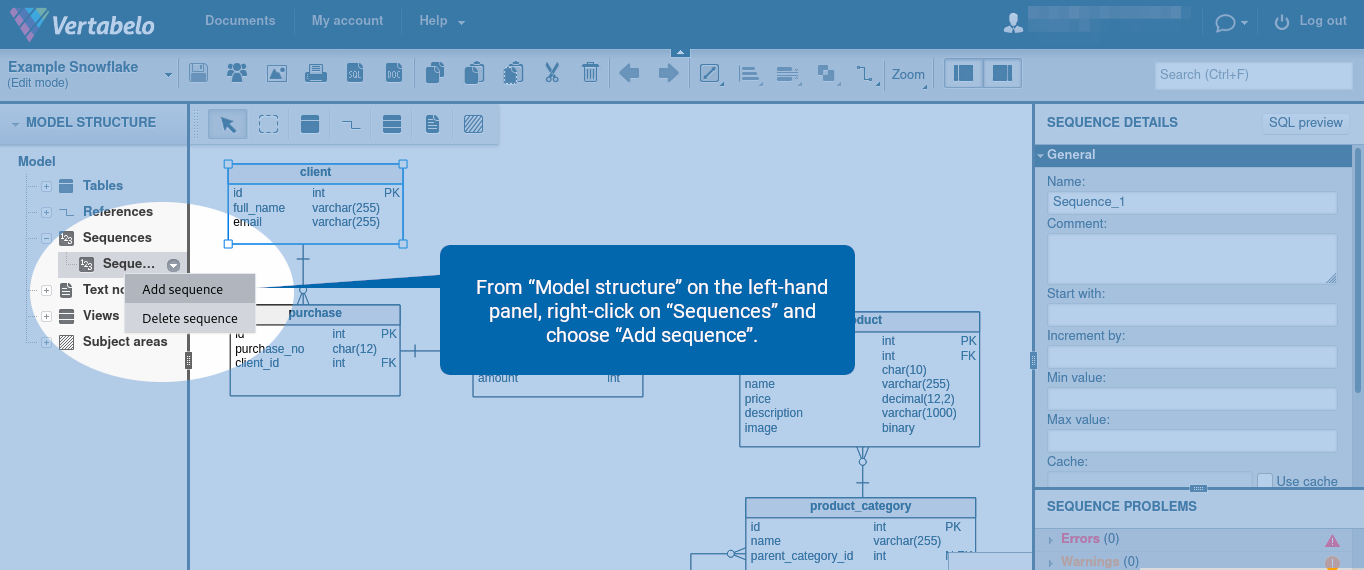
From “Model structure” on the left-hand panel, right-click on “Sequences” and choose “Add sequence”.
Sequence Options
To see the sequence properties, find “Sequences” from “Model Structure” on the left-hand side. Click the + button next to it to see the available sequences. Then, click on the sequence name. The configuration options are in the right-hand panel.
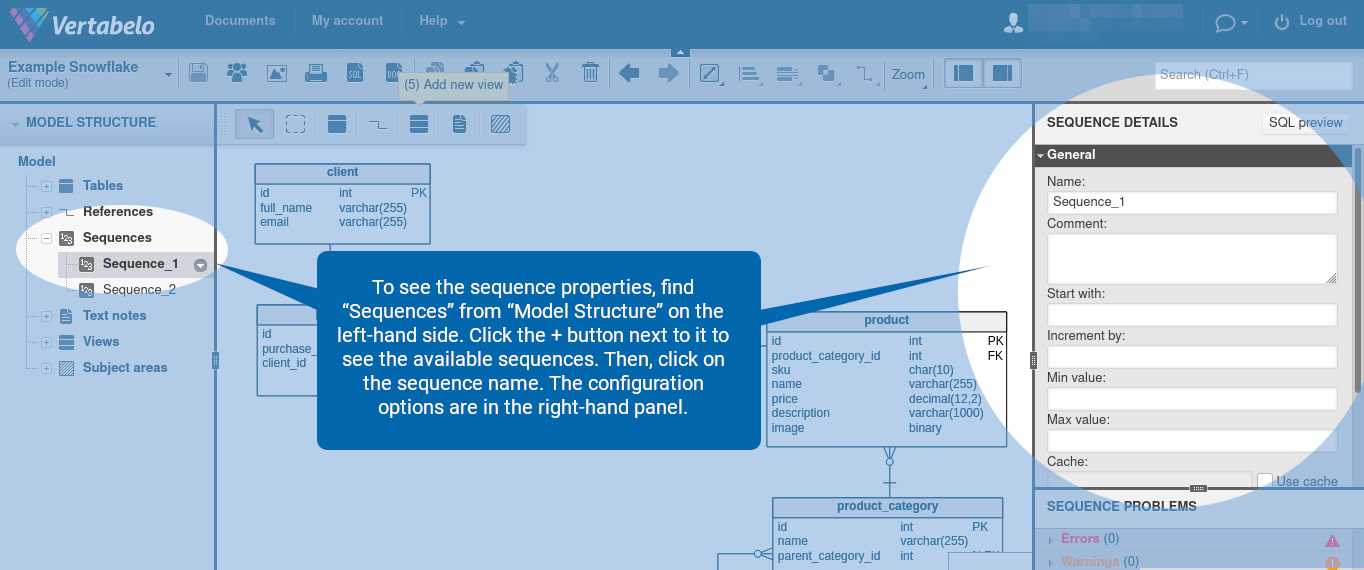
The following sequence properties are available:
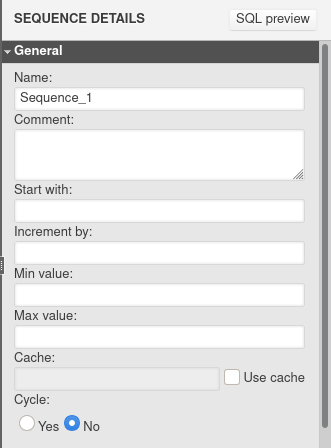
Let’s discuss each of them in detail.
- Comment – This parameter sets the comment to be inserted for the sequence.
- Start with – The starting value.
- Increment by – The step by which each successive value is incremented.
- Min value, Max value, Cache, Cycle – these parameters are not supported by Snowflake and are ignored during DDL code generation.
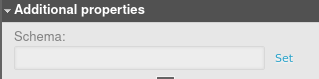
Scroll down to see “Additional properties”. Here, you can specify the name of the schema in which the sequence will be placed.
Views
Note: You can read the full documentation on working with views in Vertabelo for more details.
How to Draw a View
To add a view, click the ![]() icon. Alternatively, you can use a shortcut by hitting “5” on the keyboard.
icon. Alternatively, you can use a shortcut by hitting “5” on the keyboard.

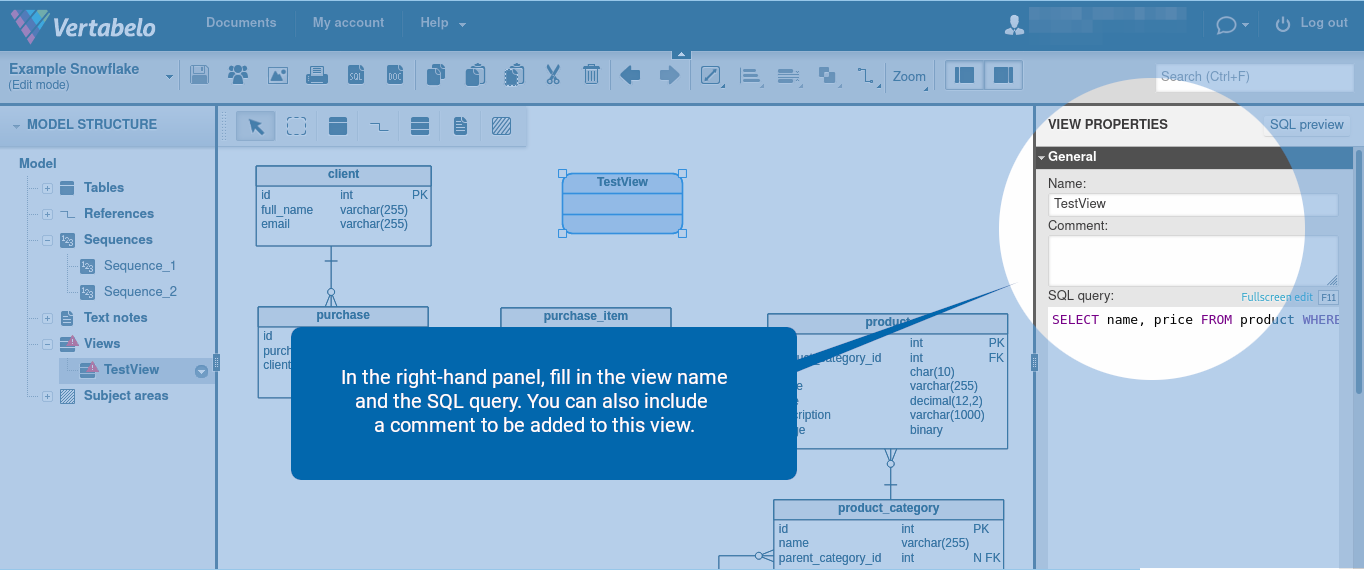
In the right-hand panel, fill in the view name and the SQL query. You can also include a comment to be added to this view.
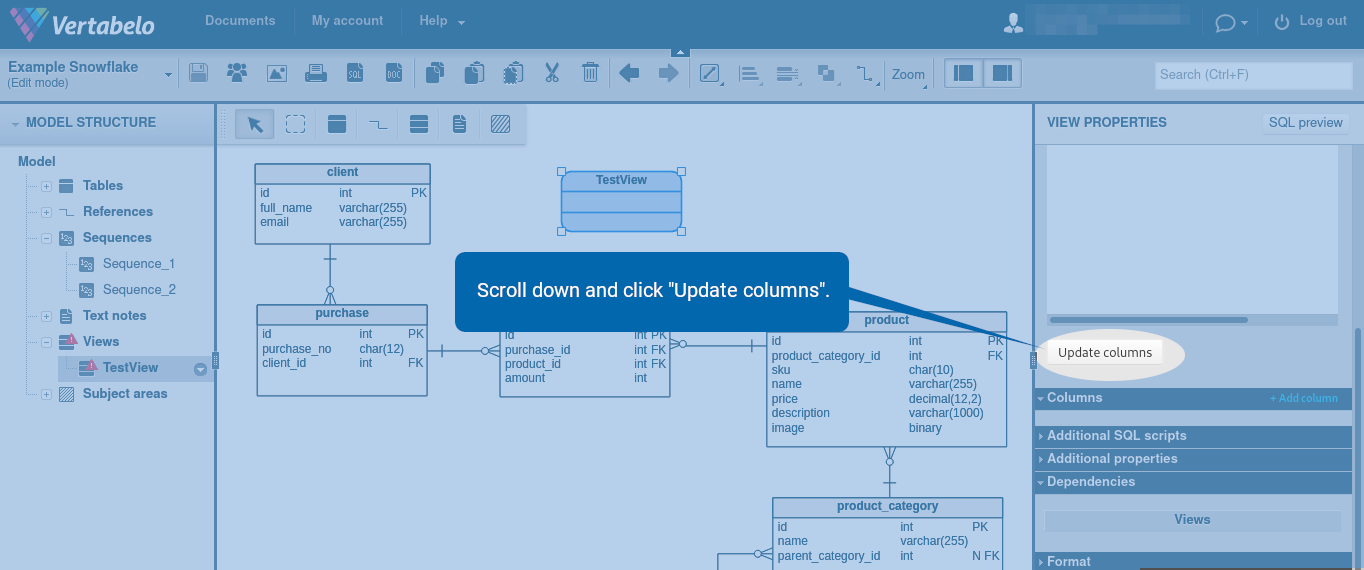
Scroll down and click “Update columns”.
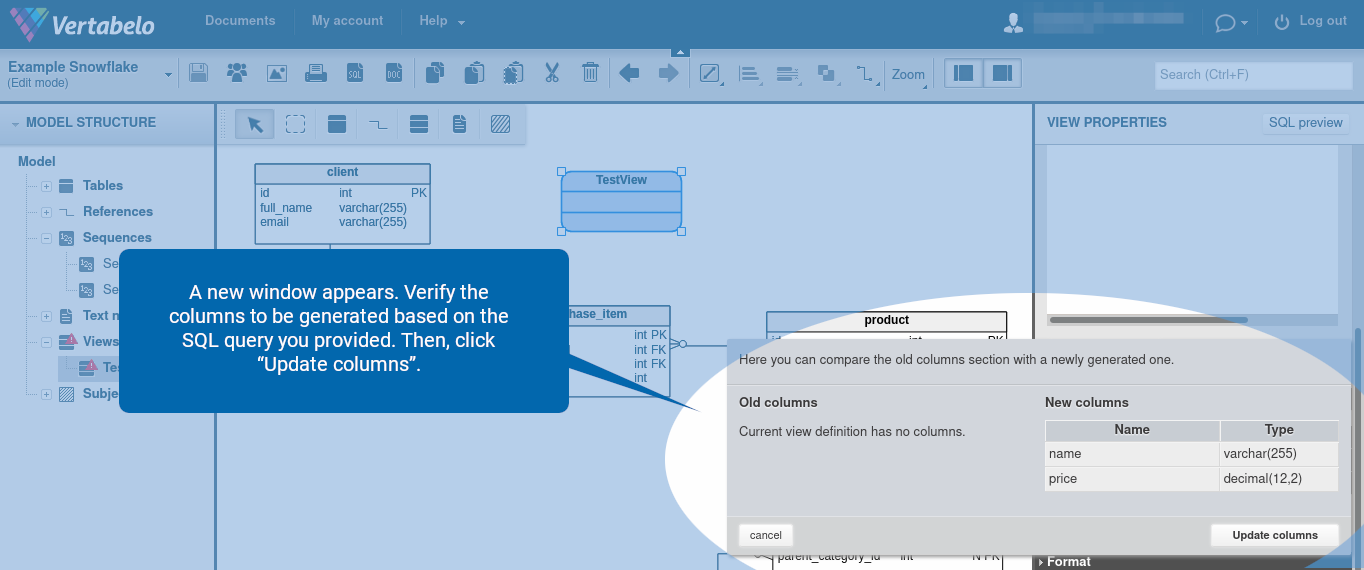
A new window appears. Verify the columns to be generated based on the SQL query you provided. Then, click “Update columns”.
View Properties
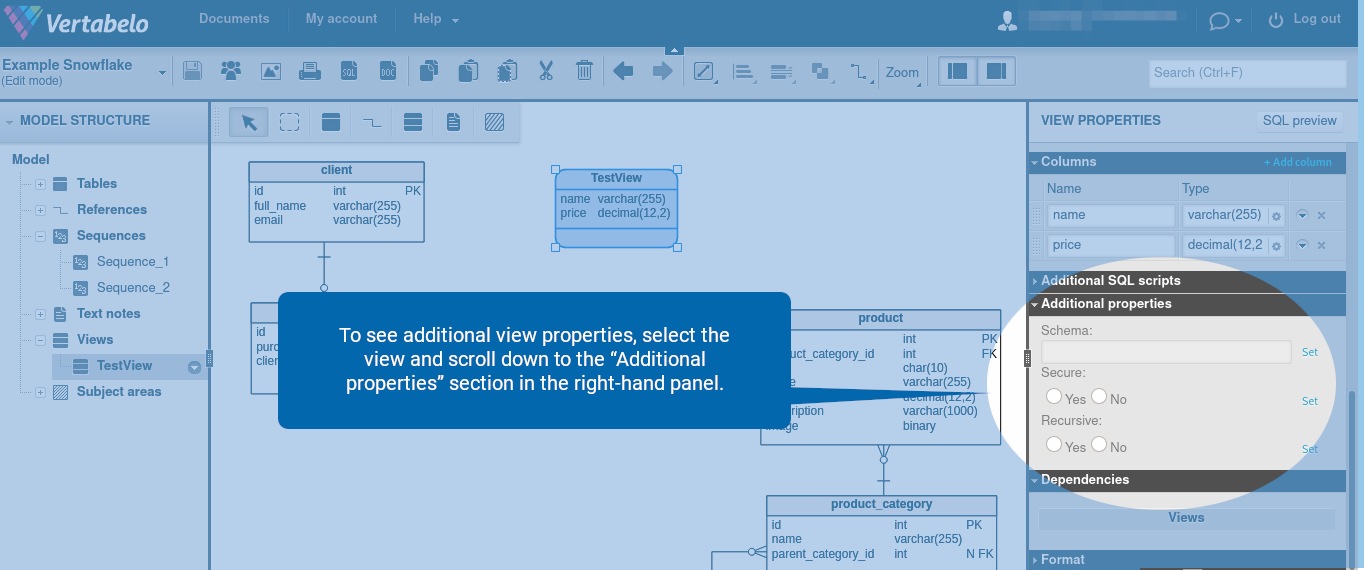
To see additional view properties, select the view and scroll down to the “Additional properties” section in the right-hand panel.
You should see all the available view properties:
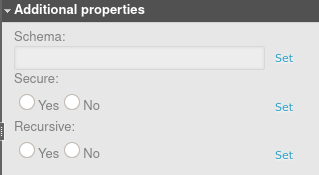
Let’s briefly discuss the role of each view property in Snowflake.
- Schema – The name of the schema in which the table will be placed.
- Secure – If set to Yes, the view is secure. This means the underlying tables, the internal structural details, and the underlying data in the base tables of a view are hidden by default and can only be accessed by authorized users.
- Recursive – If set to Yes, the view is recursive, meaning it can refer to itself. This option is available only for non-materialized views whose results are not stored anywhere and are created by running the query when the view is referenced.
Materialized Views and External Tables
Materialized views and external tables are not yet available in Vertabelo. They will be available soon.
Other Objects Specific to Snowflake
Objects specific to Snowflake, such as Share, File format, Stage, Stream, Pipe, Task, Function, and Procedure are not yet available. However, you can define them using the “Additional SQL Script” field.
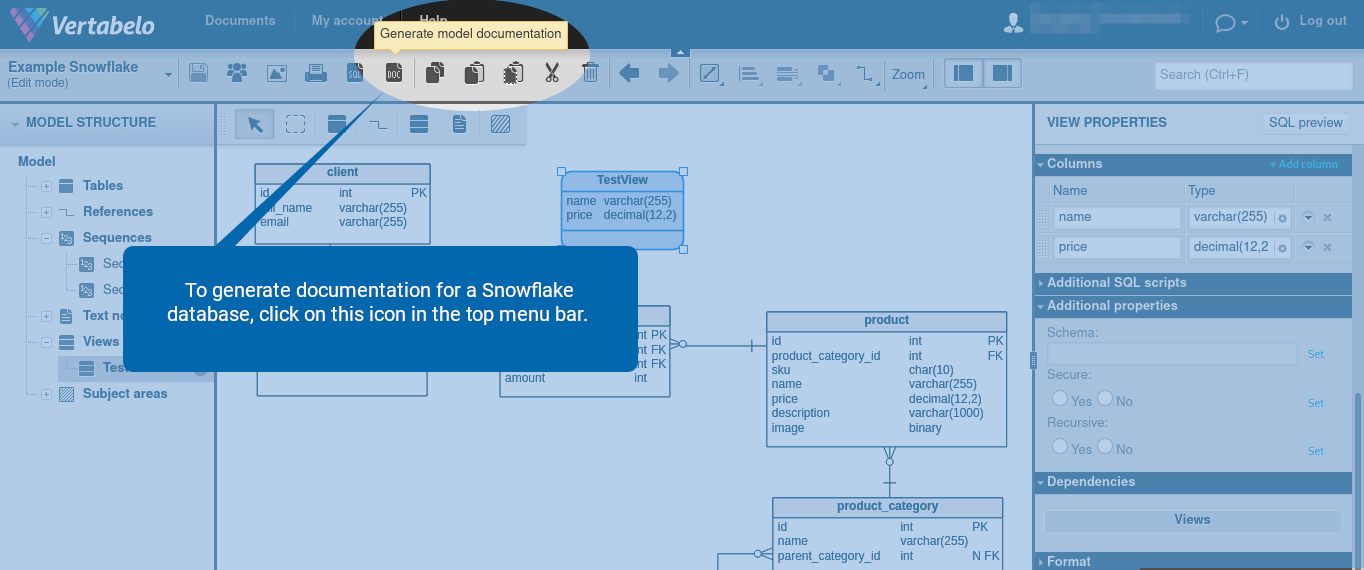
Generate Documentation
To generate documentation for a Snowflake database, click on the ![]() icon in the top menu bar.
icon in the top menu bar.
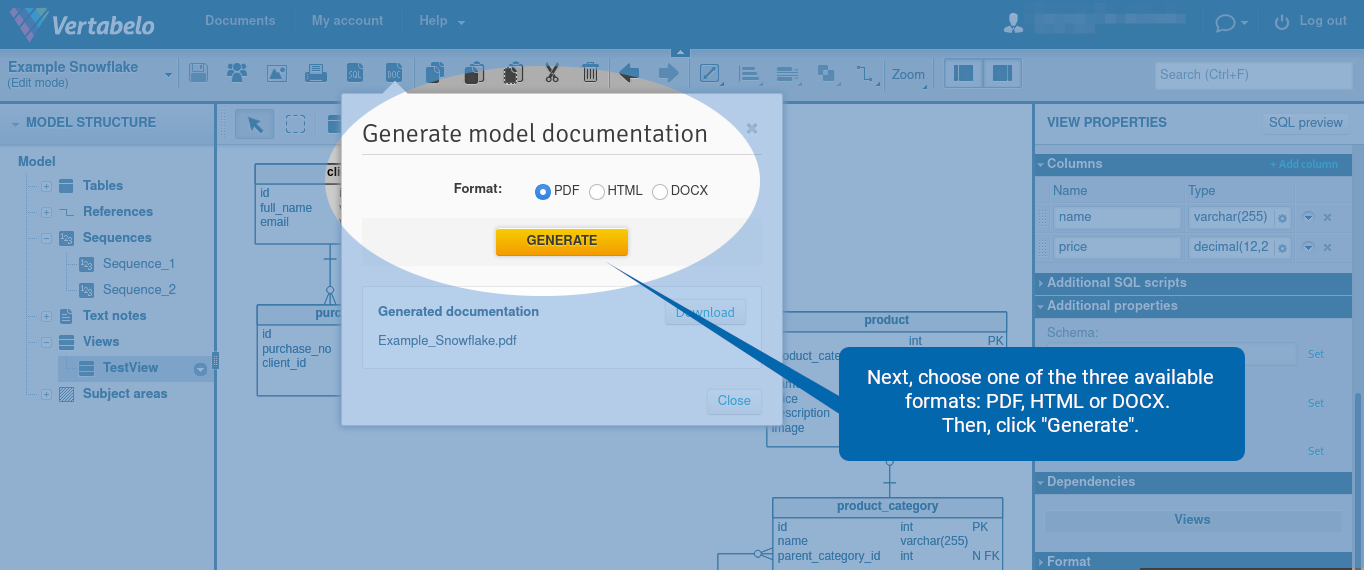
Next, choose one of the three available formats: PDF, HTML, or DOCX. Then, click “Generate”.
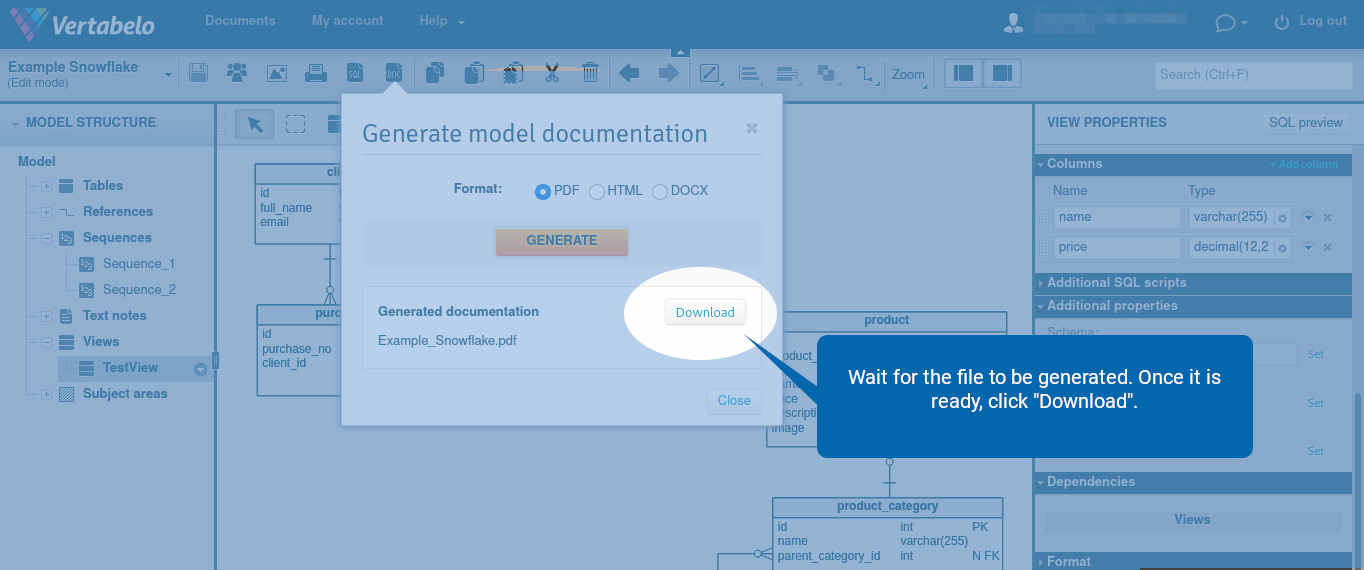
Wait for the file to be generated. Once it is ready, click “Download”.
The Snowflake documentation contains lists of the following database objects:
- Tables and their columns
- Views
- References
- Sequences
Upload a DDL File to Vertabelo
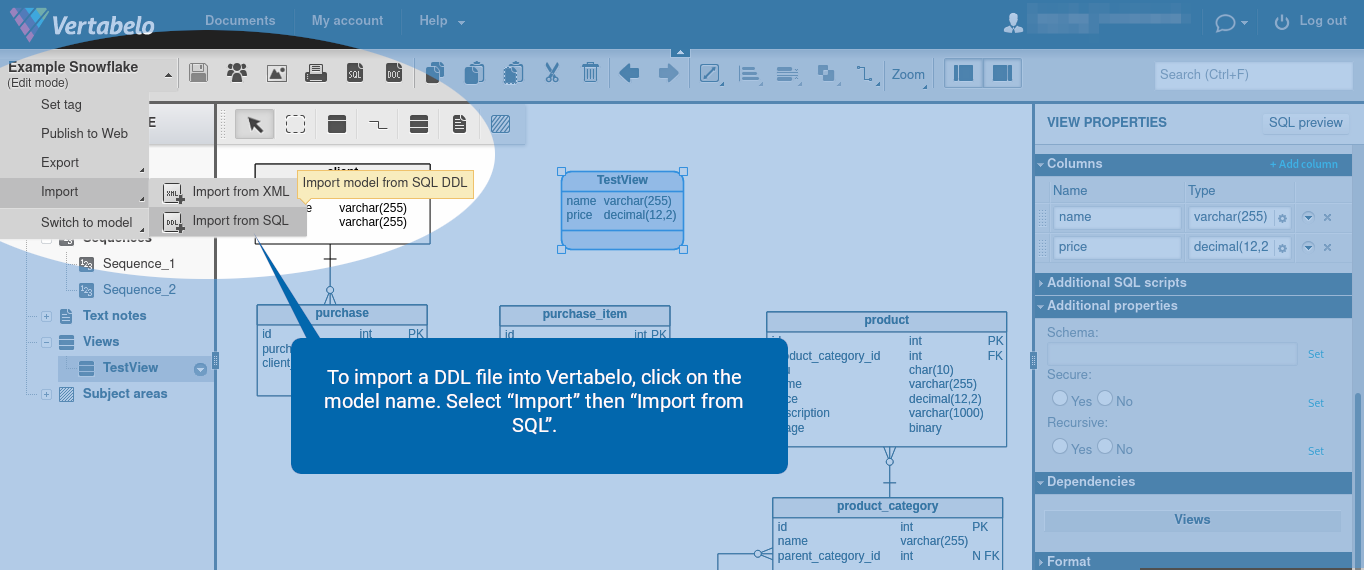
To import a DDL file into Vertabelo, click on the model name. Select “Import” then “Import from SQL”.
Reverse Engineering
Our reverse engineering app also works for Snowflake. You can read more about reverse engineering in Vertabelo on our blog.
Generate a Migration Script
Vertabelo can automatically generate migration scripts for Snowflake. Migration scripts contain SQL statements for updating the database structure and can be useful in going from one version to another when its model has multiple versions. You can learn more about migrations in Vertabelo in our documentation and in our blog.
In our example, we have added a new view.
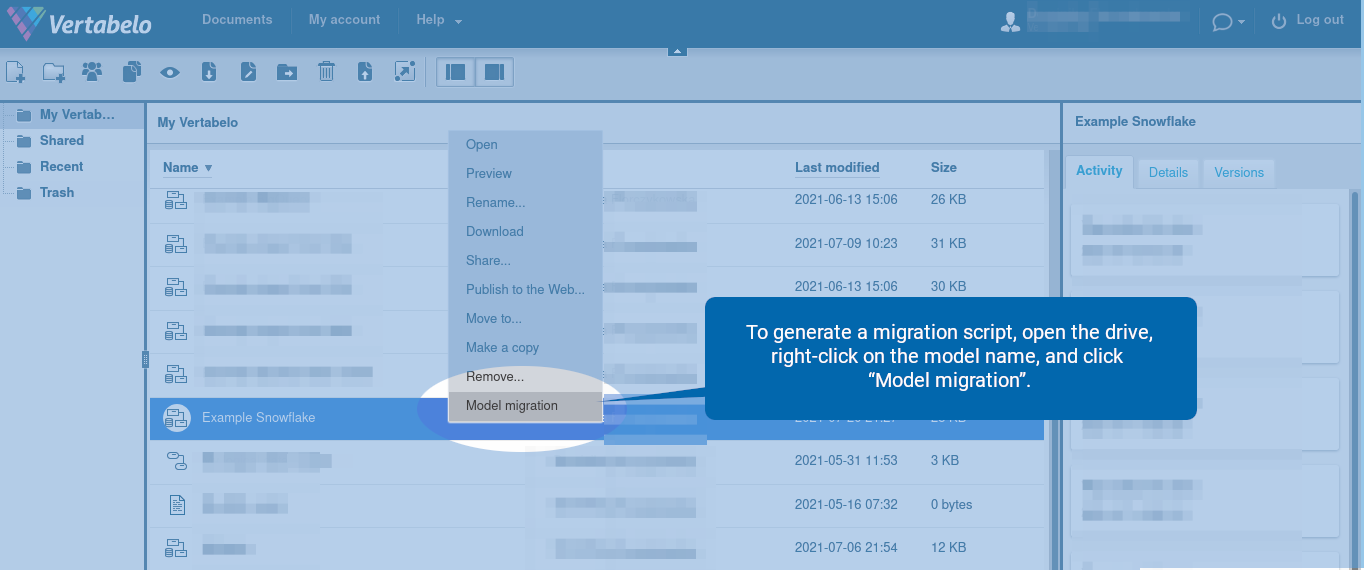
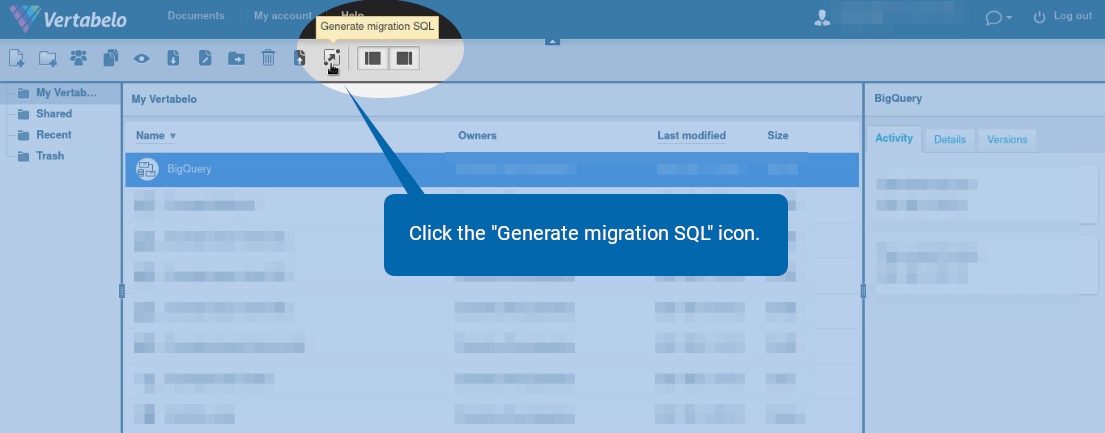
To generate a migration script, open the drive, right-click on the model name, and click “Model migration”.
Alternatively, click the ![]() icon.
icon.
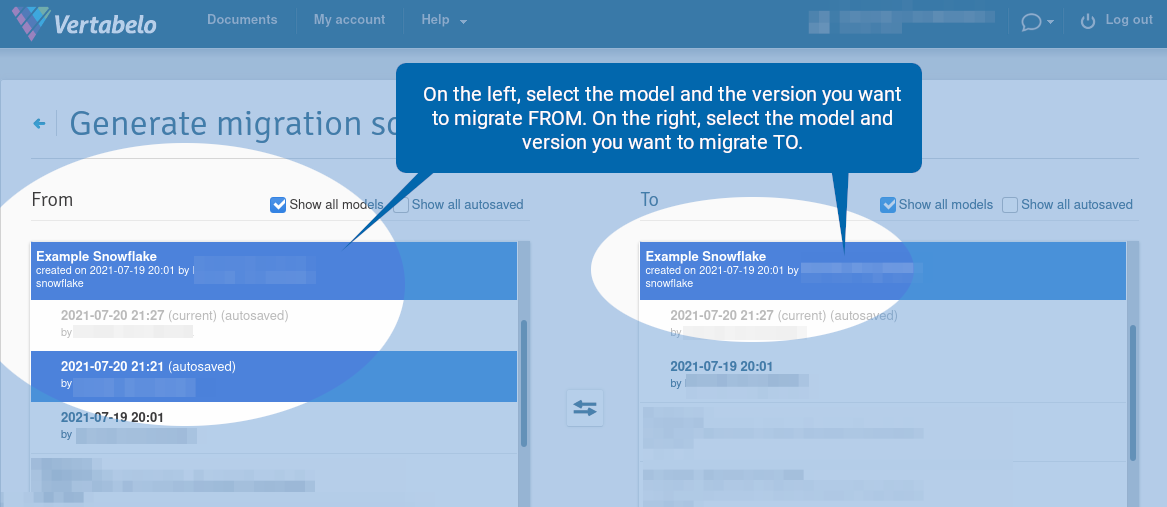
A new browser tab opens. On the left, select the model and the version you want to migrate from. On the right, select the model and version you want to migrate to.
Note that you can select two versions of two different models. In this case, make sure the “Show all models” option is checked.
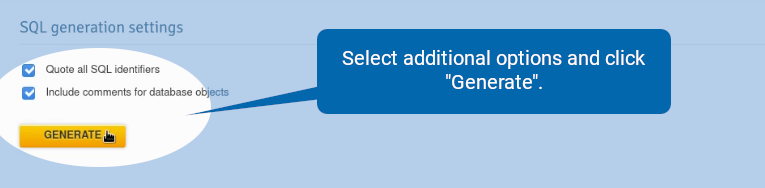
Scroll down, select additional options, and click “Generate”.
Verify the SQL statements generated and click “Download”.

Note that if you modify the table or view, the migration script generated by Vertabelo drops the table/view and creates a new one.
Design Your Own Snowflake Schema With Vertabelo!
In this article, we have explained all the Snowflake features now available in Vertabelo. Make the most of our database modeling tool when designing your Snowflake database!
