Subject areas
Databases are usually quite big. They’re full of tables, references, sequences, views and all these things together make it really easy for a database architect to get lost. Luckily, when you design your database using Vertabelo, you can use subject areas to help you anytime you feel overwhelmed by the amount of a model’s elements. Thanks to subject areas, we can:
- increase the model’s readability
- group model’s elements according to their functions
- make it easy to navigate through the model
- simplify searching for elements
- use the same table several times in one model
Sounds good, doesn’t it? Then, let’s learn how to use them.
Adding a new subject area
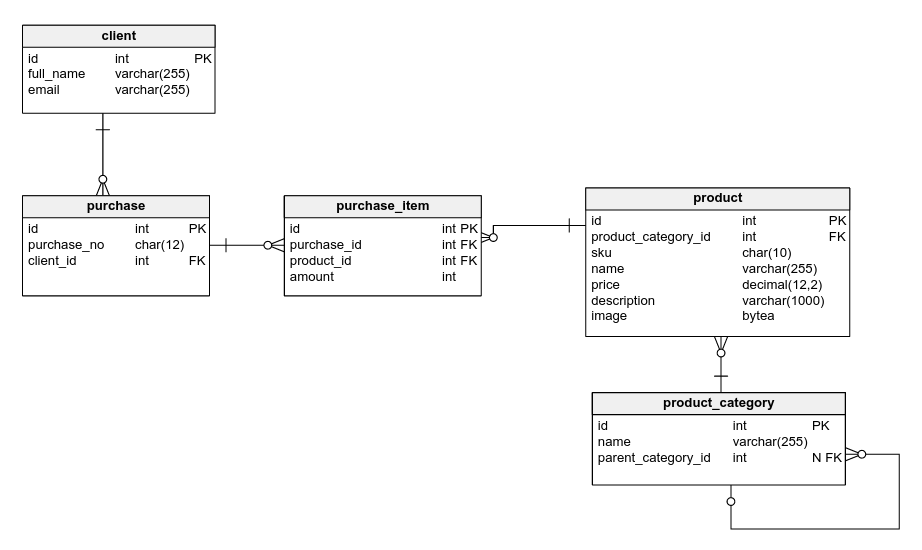
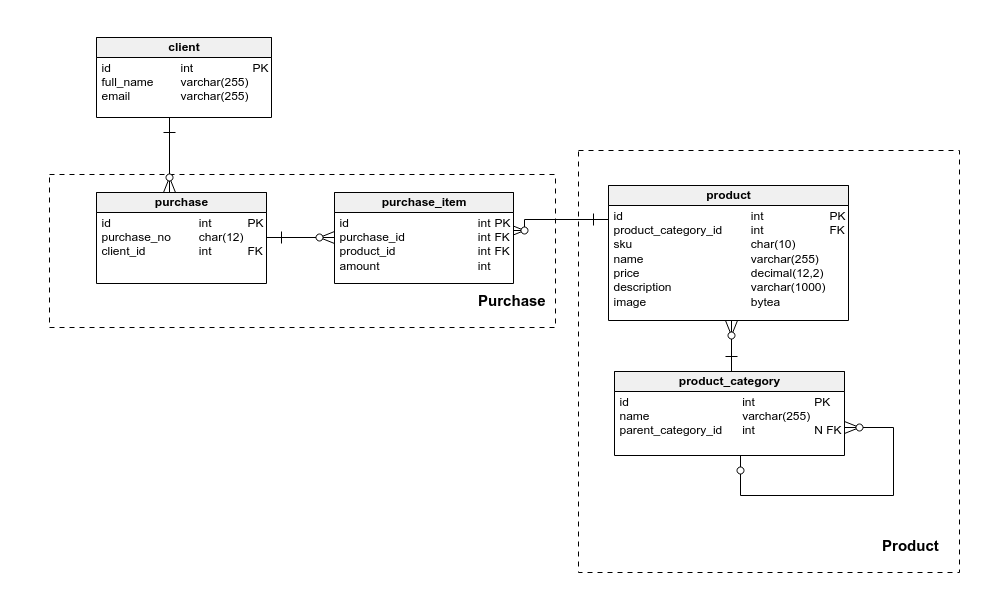
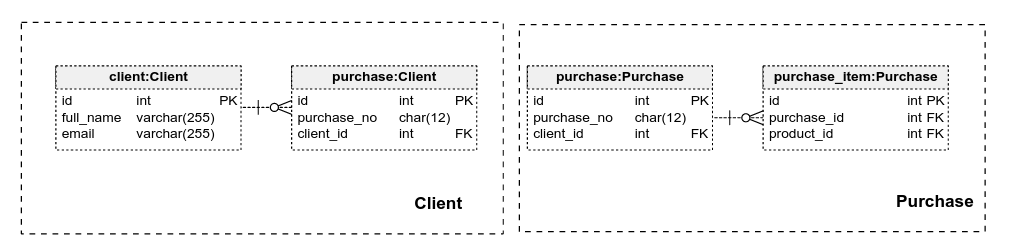
We’re going to use subject areas on a model of a simple shop. Our aim is to create two areas – Purchase and Product and put all related elements into them.
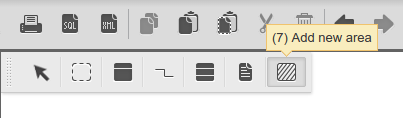
To add a new area either click this button on your toolbox or press 7 on your keyboard.
Click and hold the left mouse button and drag your cursor to draw a box around all of the elements which are going to be in your area.

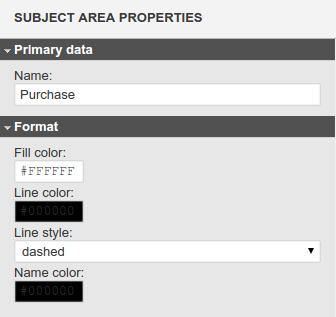
In properties, you can change the area’s name and give it a unique look by changing colors or a line’s style.
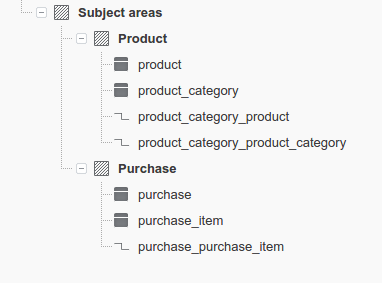
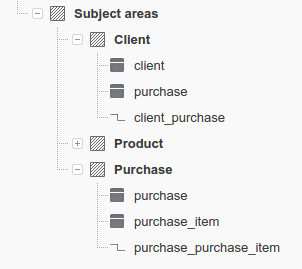
Now, we’ve got two areas – Purchase and Product, just as we desired. Let’s go to Model Structure to see what has changed there.
Subject areas in Model Structure
If you want to change something in just one table, you don’t have to go through all the tables or search for it in your whole model any more. All you have to do now is to choose the right subject area and then proceed to your table directly. Obviously, you can do the same with references and views.
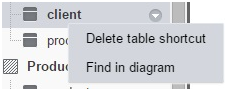
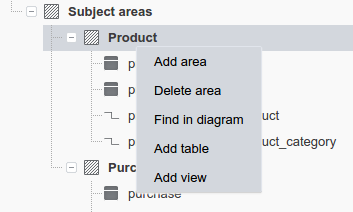
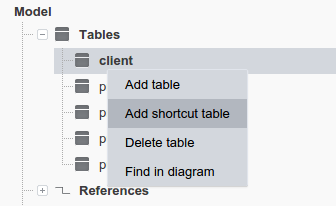
Right-click on the area’s name in Model Structure to access some additional features like finding the area in a diagram or adding new elements to it.
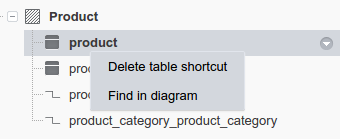
By doing the same with an element, you can find it in the diagram or delete a table shortcut. What is a table shortcut? You will find out soon, but using it in that case will just delete the table.
Overlapping subject areas
What’s more, areas can overlap. Let’s say we want to have a Client area with the purchase table inside, which is already in the Purchase area.
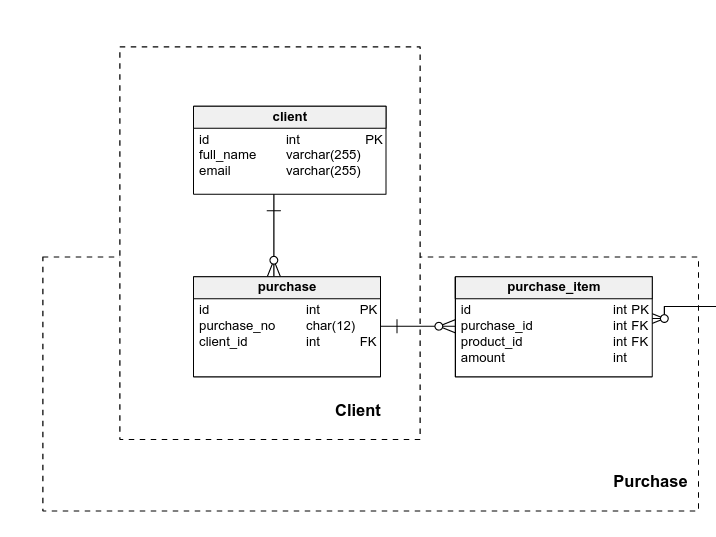
As you can see in the image below, it’s not a problem at all. Now we’ve got the purchase table in both areas, what is absolutely fine.
But what if we are using thousands of tables and millions of references and overlapping is not enough? What if a table is used for completely different functionalities and we want to be able to access it in only one exact context? The answer is: shortcuts.
Shortcuts
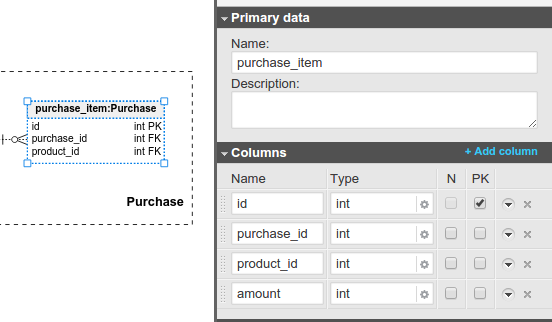
Let’s try to do exactly the same thing like we did above – creating two different subject areas containing the purchase table, but now using shortcuts. Begin by adding one shortcut for client, one for purchase_item and two for purchase. This can be done by clicking the Add shortcut table under the right-click menu.
However, the most convenient way to do this to click the name of the table and then hold down left mouse button until you place the shortcut in the desired place.
Shortcuts are automatically enumerated in their names.

Let’s create subject areas containing adequate shortcuts, just like we’ve done before. Note that the shortcuts’ names have changed and now they contain names of the subject areas they belong to.

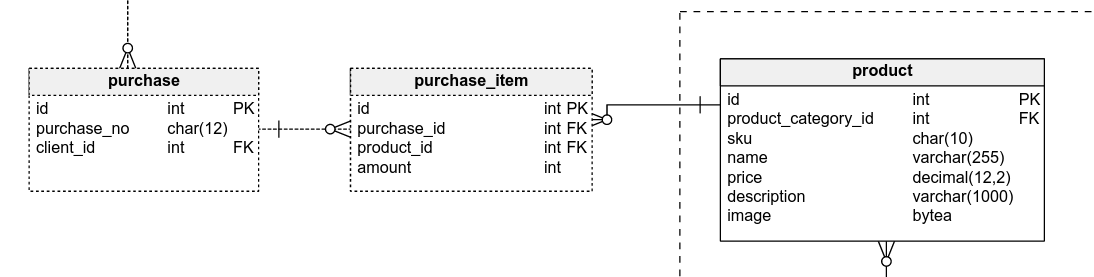
To get the references between these tables back, Control-click all of the tables in the area and then click Show all references.

Now, in each area we’ve got only the references relevant to it, which makes our model much more readable, especially in the case of tables involved in multiple references.
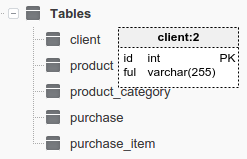
Shortcuts in the model are distinguished by having a dashed line as a border. Adding any shortcut to a table changes the table’s initial representation into a shortcut too.
If you check the properties of the shortcut, you will see that it’s only a representation of the table already existing in our database and nothing more. Therefore, any change to the table’s properties will affect all shortcuts in the model.
Shortcuts in Model Structure
Note that areas in Model Structure look exactly the same as they did when we used overlapping instead of shortcuts.

The only difference is that now we can use Delete table shortcut in the intended way, namely deleting a table shortcut will delete only a shortcut in its area, not the whole table.