

See how Vertabelo can help you design a database diagram for Redshift.
This article will show you how to use Vertabelo as a database modeling tool for Redshift. It allows you to design and implement a database model in a simple way. (Vertabelo also supports other database management systems, but in this article we’ll focus on the Amazon Redshift DBMS).
What Is Amazon Redshift?
Amazon Redshift is a Cloud-based, data warehouse oriented implementation of PostgreSQL database engine designed and offered by Amazon. As with many other data warehouse implementations, data is stored in columnar-based structures rather than row-based ones; MPP (Massive Parallel Processing) technologies allow Redshift to process huge amounts of data in a very short time while still using the well-known SQL language.
Redshift is fully managed, meaning that all operations (like backups, patching, etc.) are completely handled by Amazon without requiring user intervention.
Since Redshift is based on PostgreSQL 8.0, migrating from PostgreSQL databases to Redshift is quite simple. See the article Converting an Analytics System from Postgres to Redshift to learn how to move your PostgreSQL to Amazon Redshift.
And before you start designing your data model, take a look at the article Best Database Modeling Tools for Redshift to review the best tools available for data modeling with Redshift.
Creating a Redshift Physical Data Model Using Vertabelo
After logging in into the Vertabelo data modeler (you can request a free trial account if you are not already a user), we’ll create a new Redshift ER diagram by clicking on the Create new document icon on the left section of the taskbar:

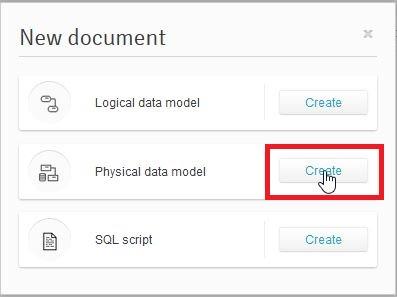
We need to select the type of document we want to create. In this case, we need to pick the Physical Data Model, as shown below:
Then we need to provide a name for the data model and select the desired database engine (here, Redshift). Once we’ve made these selections, we press the Start Modeling button:

And now we are ready to start modeling!
Adding Tables
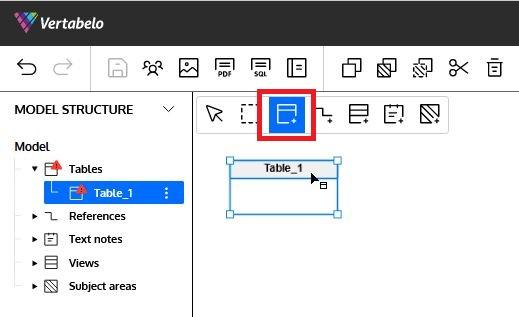
To add a table to the model, we click on the third icon of the diagram taskbar (marked in red) and then click on any empty space in the diagram:
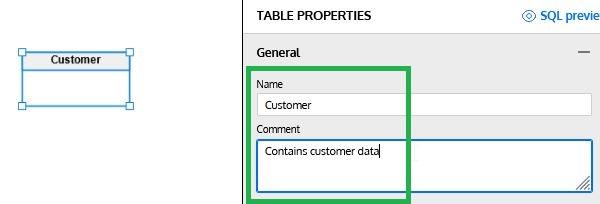
The Table properties panel will appear on the right side of the Redshift ER diagram. It allows us to start defining all the details of the new table. The first thing we are going to do is to provide a name and description for the table:
Adding Columns
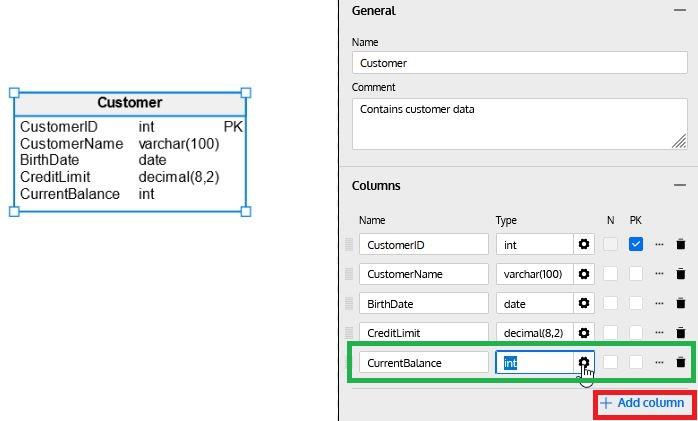
To add a column to the table, simply click on the + Add Column button in the Columns section. Then we can enter the column name, data type (click on the gearbox icon to select the data type from the list) and select if the column allows NULL values (select the N checkbox) or if it is part of the primary key (select the P checkbox):
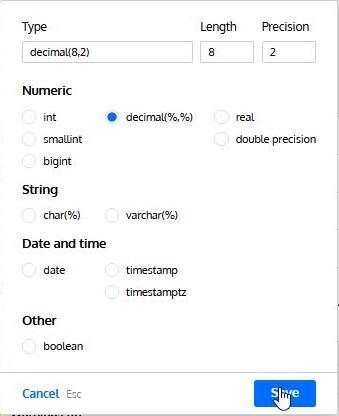
Data Types
The Datatype wizard simplifies the selection of the data type, showing the ones available for the selected database engine. It also lets us define length and precision (when required):
Additional column properties
By clicking on the … icon (marked in red below) on each column row, additional column properties can be set:
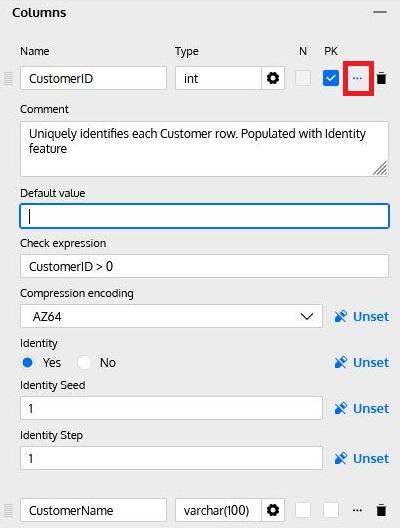
These properties include:
- Description: Describes the column’s contents and/or purpose.
- Default Value: Provides a default value when a new row is inserted but the column is omitted in the INSERT command.
- Check Expression: Defines an expression to be checked whenever a row is inserted or updated. Note: Check expressions are currently ignored in the SQL Preview and the SQL Script generation for Redshift databases, since Redshift does not support them.
- Compression Encoding: Redshift’s columnar architecture benefits from compressing stored data. This additional property allows us to define the column compression type. Note: By default, Redshift uses AUTO at the table level and automatically assigns a compression type to each column. If we define compression at the column level, Redshift automatically overrides the AUTO setting. In other words, we will need to define the compression for EACH column in the table if we specify this.
- Identity / Identity Seed / Identity Step: The identity feature in many databases allows a number to be automatically assigned at insert time for each row. To enable this feature, we must define an initial value (seed) and an increment (step); the database engine will then automatically generate values each time a row is inserted.
Defining a Primary Key
Although we can define which columns belong to the primary key by selecting the checkbox in the Columns section, more options are available in the Primary Key section of Table Properties. Here we can define a name for the PK, add new columns to it (by clicking on + Add column”) or change the order of columns in a composite primary key:
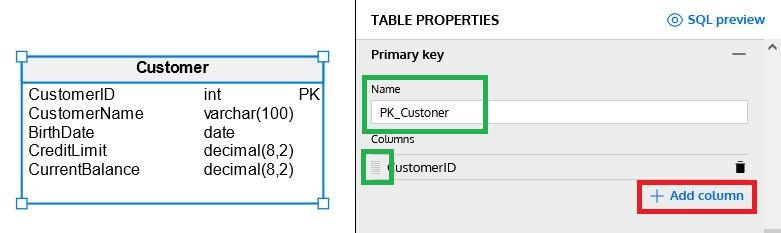
Note: To change the order of the columns, click on the icon at the left side of the column name and drag the column up or down.
Defining Unique Keys
Tables can have additional unique (or alternate) keys to guarantee that some columns do not contain repeated data. In our example, we have just added a PassportNbr column to our Customer table and defined a unique key on it:
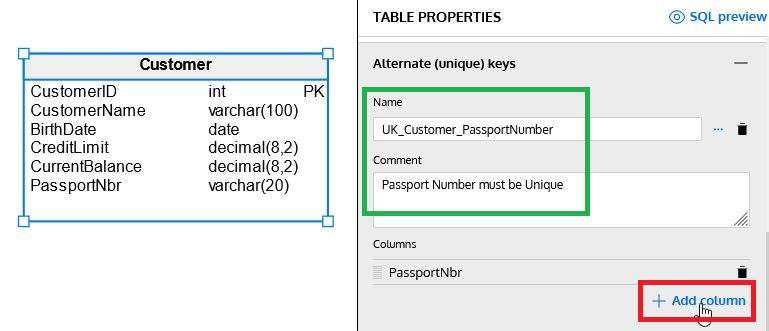
Note: We can generate composite unique keys by adding more columns with + Add column. We can rearrange columns using the icon on the left of each column name.
Additional Properties
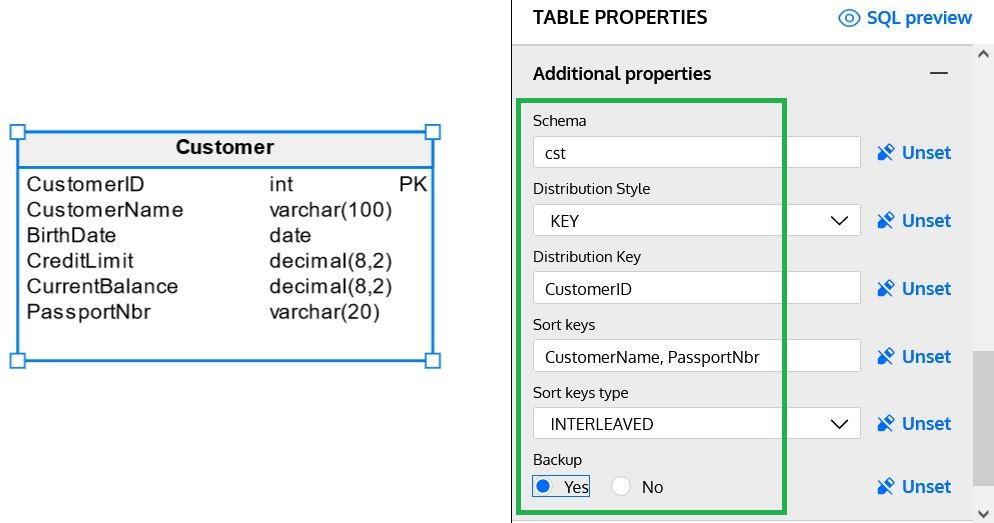
This section allows us to define additional properties for each of the tables we are creating in our data model. Those properties vary for each database engine; in Redshift, we have the following:
Schema
Schemas are a logical way to organize tables. If a data model is complex, it is a good idea to separate tables in smaller groups based on functionality or other classification. A schema represents one of these groups.
Distribution Style & Distribution Key
Data in a Redshift database can be distributed across multiple nodes on a cluster. You can choose one of the following distribution styles:
- ALL: Data is distributed to all nodes in the cluster. This is ideal for small tables that do not change frequently, although it requires some extra storage.
- EVEN: Data is evenly distributed across all nodes using a round-robin mechanism. This is a good scenario for tables that do not participate in JOINs.
- KEY: Data is distributed according to values in a specific For example, if we select the column
InvoiceIDforInvoice(parent) andInvoiceDetail(child) table, we can ensure that all invoice details of each invoice are stored on the same node as the invoice, thus significantly enhancing JOIN performance. If we use this distribution style, we must also choose the appropriate distribution key. - AUTO: This is the default value. Redshift will automatically choose between EVEN and ALL based on the table size.
Sort Keys & Sort Key Types
Redshift allows us to define one or more columns of each table as a sort key. That means that values will be stored in the order determined by the values of the sort key(s), which can have a significant impact on performance. The sort keys can be defined as compound (default) or interleaved; compound is more efficient when a prefix subset of the sort key columns is used, while interleaved gives the same priority to each of the columns defined in the sort key.
Note: Amazon recommends using SORTKEY AUTO, thus allowing the automatic table optimization to select the best sort key.
Backup
This option tells Amazon whether to automatically include the table in cluster snapshots. It has a default value of YES, but for staging or temporary tables that do not require a backup, it can be set to NO (to avoid backing up unnecessary data).
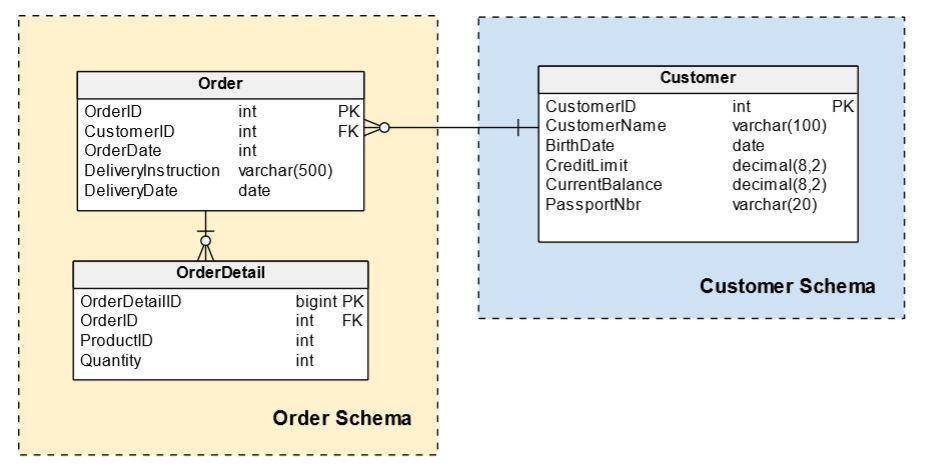
We can now add more tables reflecting the entities that we need in our database. The following is a very simple model, but it includes some of the Redshift features previously explained:
Generating the SQL Scripts
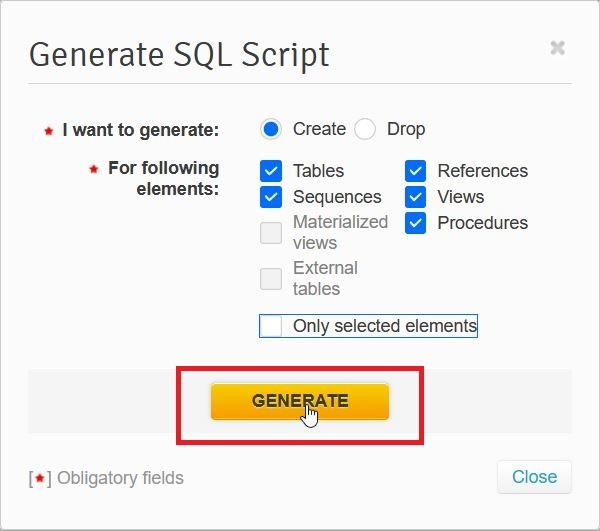
Once we have defined all the tables in our Redshift ER diagram, we can generate a SQL script to implement our entire model in a Redshift database. This can be done with just a few steps. The first one is to select the Generate SQL Script button in the top menu:

A popup window will ask us to confirm what type of objects to include in the script – the Only selected elements checkbox will generate the script for the selected objects rather than the entire model – and then click on Generate:
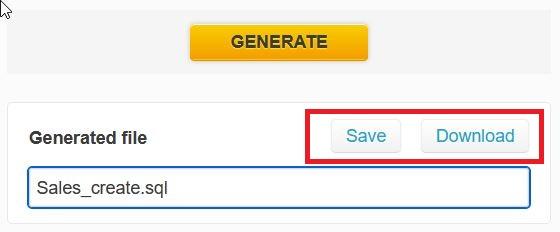
Once the script is generated, we can save it in Vertabelo or download it:
You can read the article How to Generate a SQL Script in Vertabelo to get more details on the process of creating your model scripts.
Generating the SQL Script for One Table
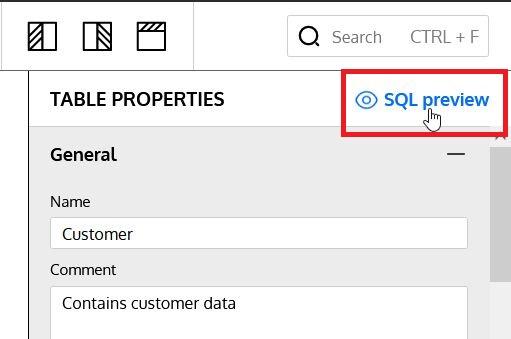
Optionally, we can choose to generate the SQL script for just one table of the data model. At the top of the Table Properties panel there is an SQL Preview button that generates a preview of that table’s SQL script:
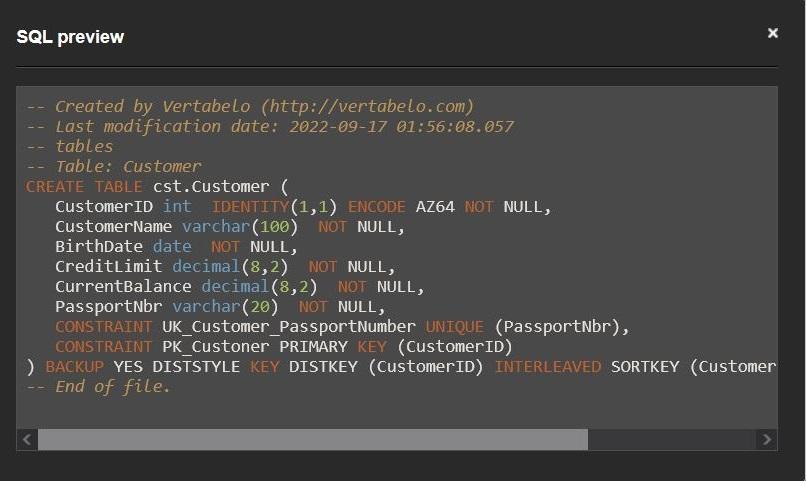
The individual script is shown in a dialog box, and we can copy its content to execute on a Redshift database:
Checking a Table Definition in Redshift
Once we implement the data model, we can use the SHOW TABLE command in Redshift to generate a DDL script for a table and validate that it matches the definition in the data model. The generated script includes the table definition and all the columns, constraints (both at table and column level) and table attributes discussed above.
Syntax
The syntax of the SHOW TABLE command is really simple; just provide the table name and optionally the schema where it belongs:
SHOW TABLE [schema_name.]table_name
Example
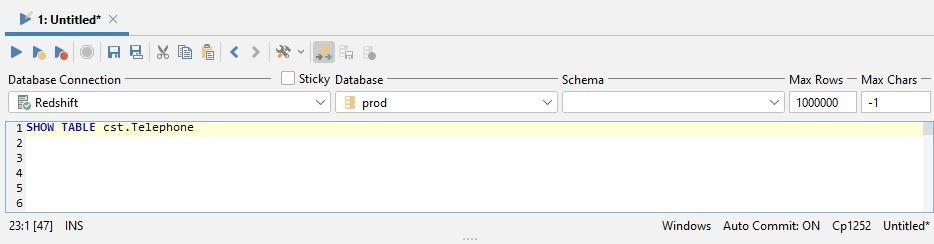
I have used DBVisualizer to connect to a Redshift instance and execute the SHOW TABLE command. I’ve done this by just entering SHOW TABLE plus the table name and then pressing F5 to execute the command:
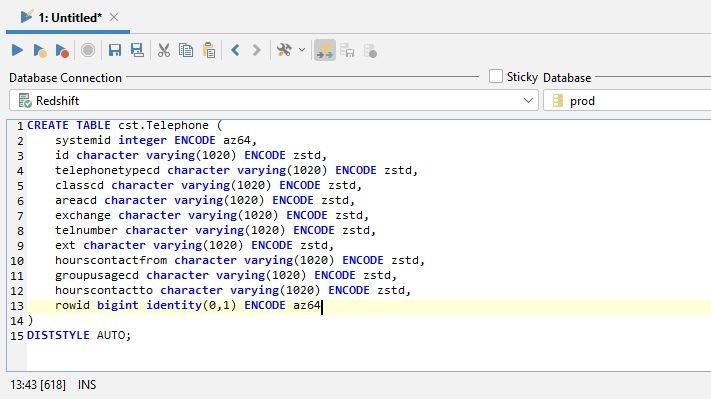
The result can be copied into a new command window; we will get the complete sentence to generate the table:
You Can Build Your Own Redshift Database Model!
And that’s it – you now know how to build a Redshift data model in Vertabelo. And because of Vertabelo’s features, you can even auto-generate the SQL script to create the database. Keep checking the Vertabelo blog for more handy tips on working with Amazon Redshift, PostgreSQL, and other database management systems.
