

Cloud technologies are becoming more and more popular. Recently, Vertabelo added support for the Snowflake database. An additional feature, much awaited by our users, was support for materialized views in Snowflake. We are happy to announce that you can now model materialized views in a Snowflake database using Vertabelo.
What Is a Materialized View?
Materialized views are different from simple views. While simple views allow us to save complicated queries for future use, materialized views store a copy of the query results. They are not always perfectly up-to-date, but can be very useful if the results of complicated queries must be obtained very quickly.
In this article, we will show you how to model Snowflake materialized views in Vertabelo.
Modeling Snowflake Materialized Views in Vertabelo
1. Add a Materialized View
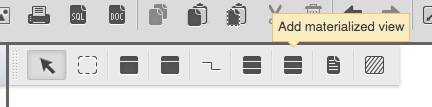
To add a view, click the Add materialized view ![]() icon.
icon.
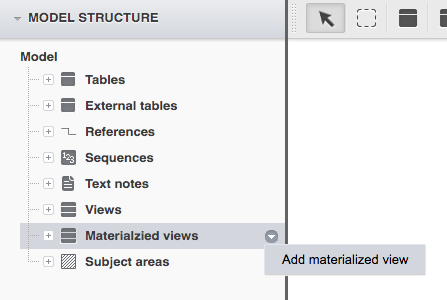
Alternatively, in Model Structure (in the left panel), right-click on Materialized views and choose Add materialized view.
2. Change the View Name
If you don’t change the default view name, the following warning will pop up:

To fix that, click on the materialized view. In the right panel, under General, type the name of your choice.
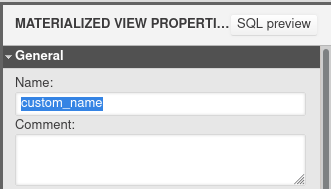
You can also add a comment to the view if you’d like.
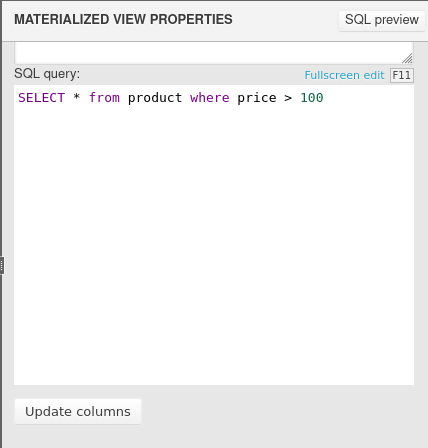
3. Add the Query
The next step is to add a query. Use the SQL query field in the Materialized View Properties panel.

Next, scroll down and click Update columns.
A new window will appear. Verify the columns that will be generated based on the SQL query you provided. Then, click Update columns.
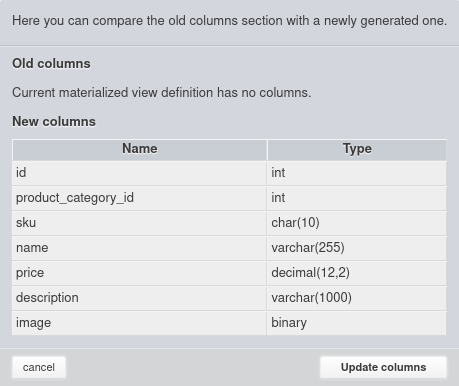
The view’s columns should be updated:
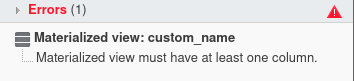
Note that the materialized view must have at least one column. Otherwise, the following error will appear:
How to Edit Columns
If the automatically generated columns are incorrect or if they need to be changed, you can always modify them manually in the Columns section of the right panel. Here you can change column names and types, add new columns, or delete existing columns.

Materialized View Options
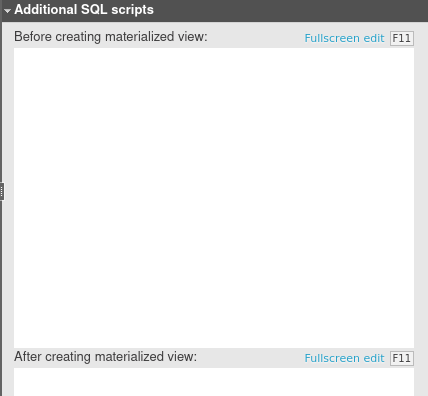
Additional SQL Scripts
To configure additional SQL scripts, select the materialized view. In the right panel, scroll down to the Additional SQL scripts section. You can add scripts that will be run before and after the materialized view is created. They can perform actions that cannot be modelled directly in Vertabelo, such as defining functions or stored procedures, adding users, or setting permissions for objects like views or tables.
Additional Properties
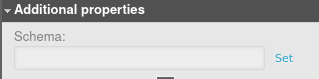
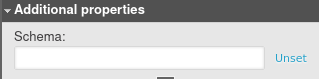
To see additional view properties, select the view. In the right panel, scroll down to the Additional properties section.
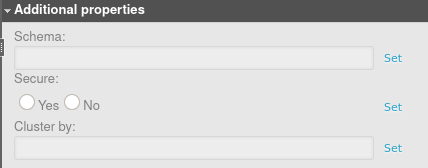
Click Set to add property.
Click Unset to remove it.
Let’s discuss the role of each materialized view property in Snowflake:
Schema – This is the name of the schema in which the table will be placed.
Secure – If this is set to yes, the view is marked as secure. This means that the underlying tables, internal structural details, and the data in the view’s base tables are hidden and can only be accessed by authorized users.
Cluster by – This property is a comma-separated list of columns or expressions that determine how to cluster the materialized view. When the materialized view is clustered, the data inserted is sorted based on the clustering columns. This can improve performance when the data is queried, as not all the rows will be scanned.
Format
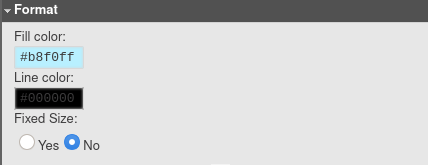
To change the view’s appearance, select the right panel and scroll down to the Format section. To change the table background color, click on the color field under Fill color. Select the desired color in the color picker. You can also choose the table’s line color and set its size to fixed.
Learn More About Materialized Views in Vertabelo
In this article, we discussed what materialized views are and how to model them in Vertabelo. You can learn more about materialized views here. To see what new features were introduced in Vertabelo this year, check out 2020 Was Vertabelo Database Modeler’s Year. It’ll Get Even Better in 2021.
